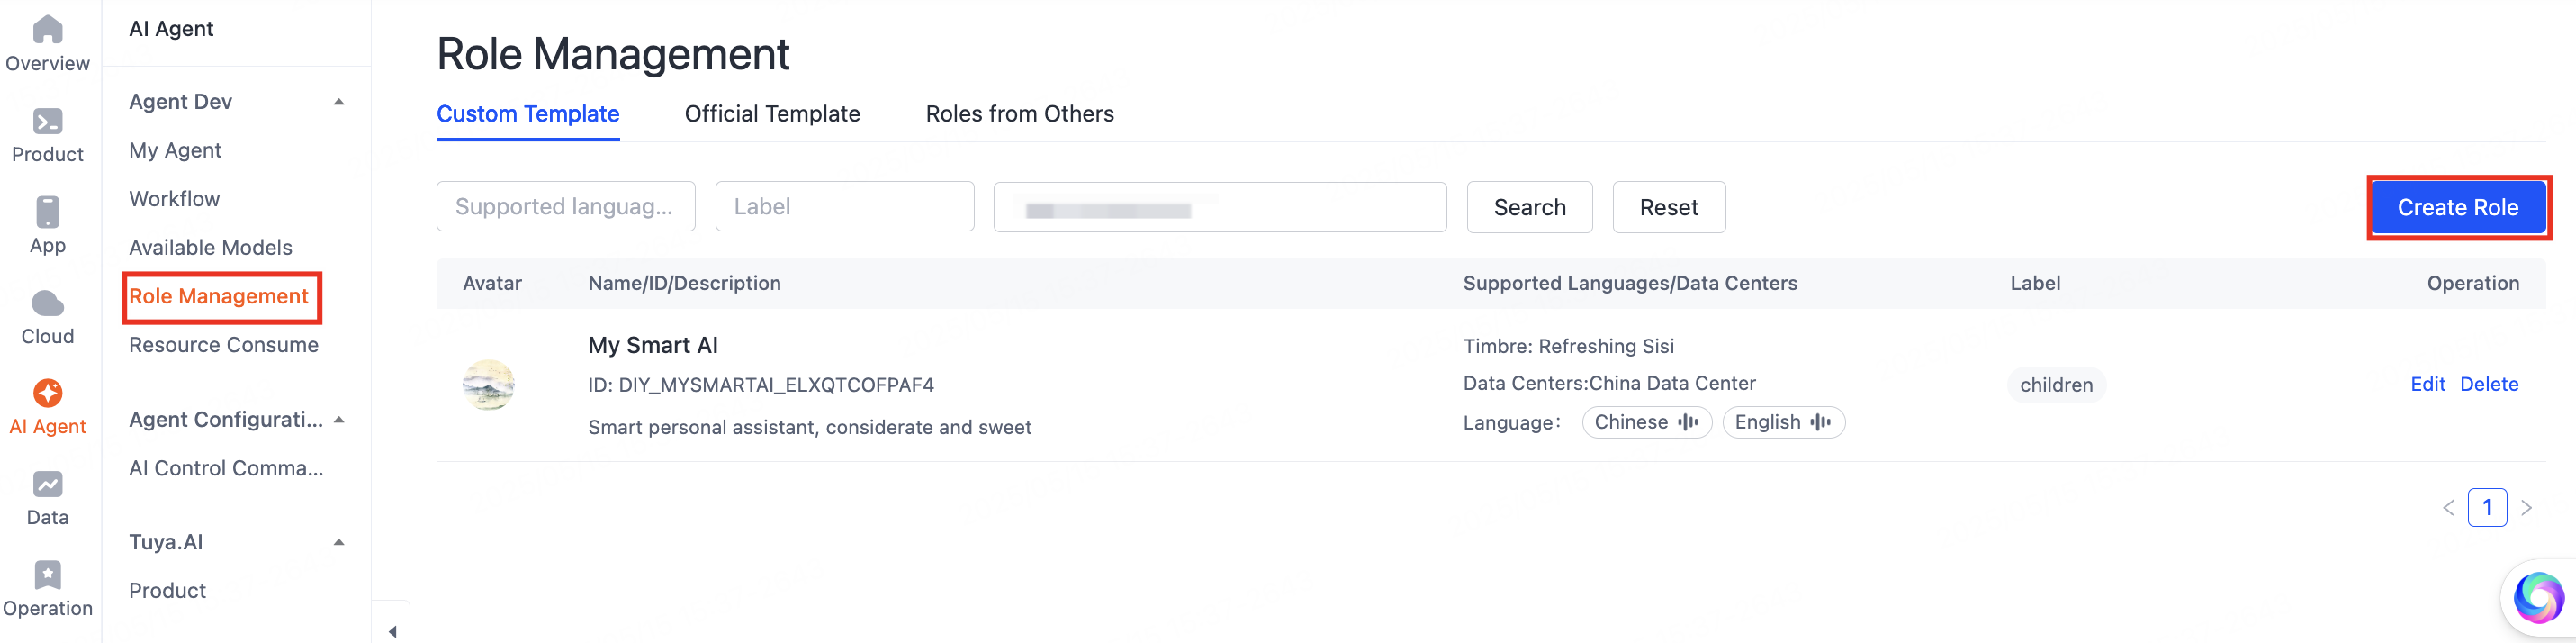
Role Management
Role management defines the personalities your AI agent can adopt — the name, description, voice, and prompt that shape how it talks. You create roles in a shared library, then bind one or more roles to an agent so a single product can switch between personas. It powers products such as AI dolls and smart storytelling robots, where each role carries its own character and chat style.
Roles cover everything used under the current account. You pick roles from the role library to match your business needs, including official reference roles and ones you define yourself.
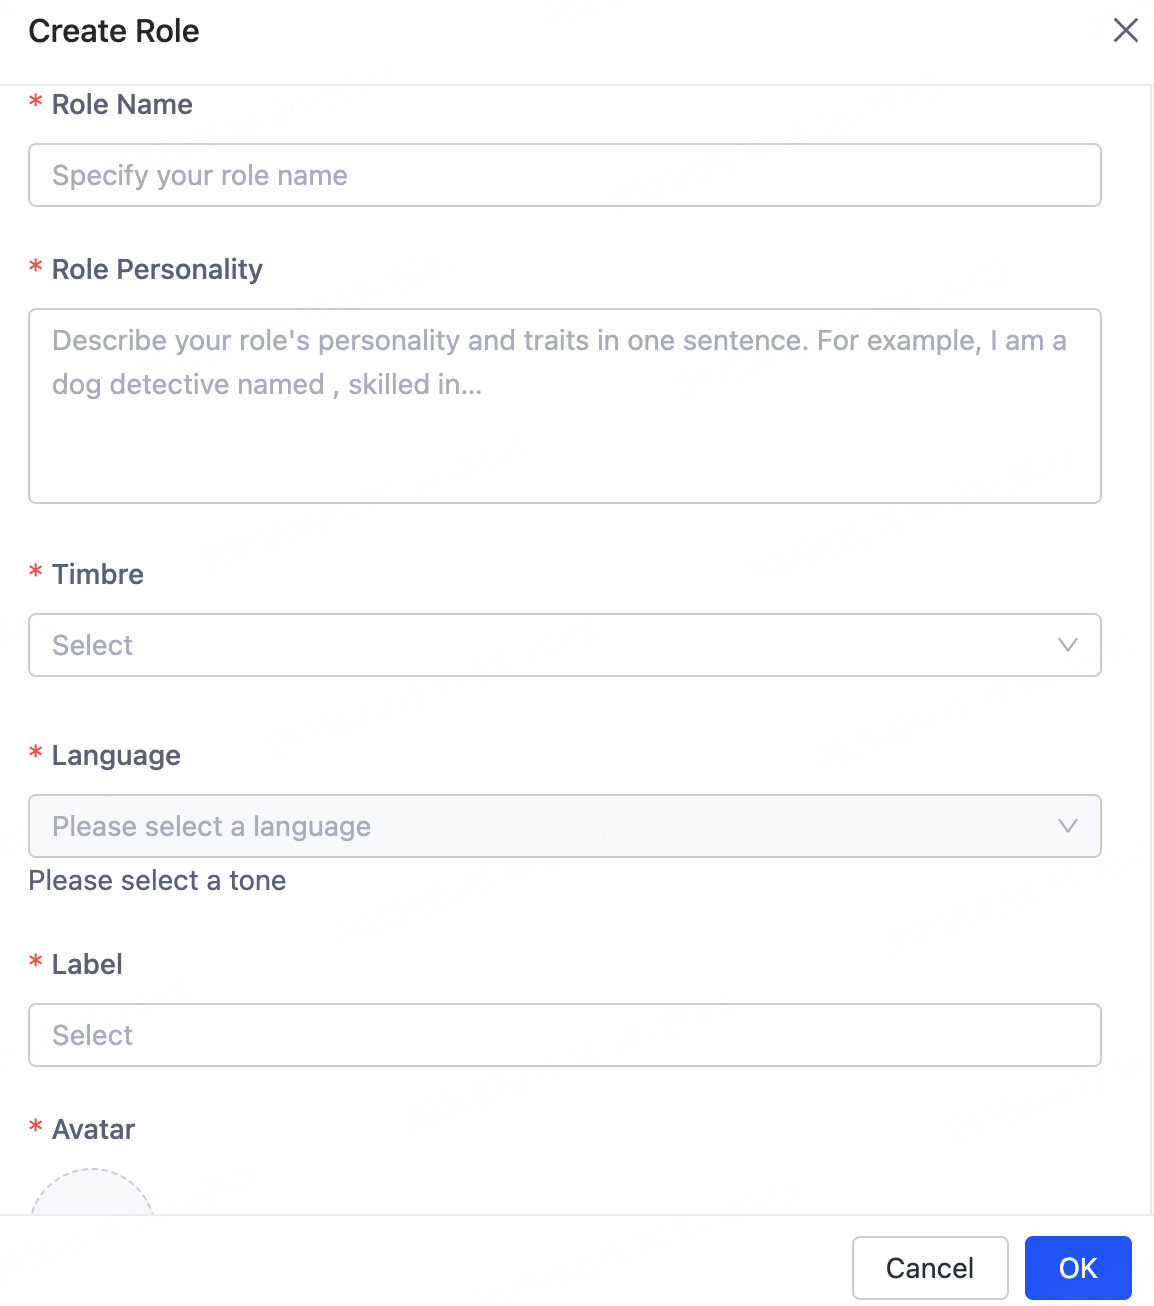
Create a role
Go to the Role Management page and click Create Role.
Configure these fields:
- Role Name: The name of the role.
- Role Personality: The role's traits, backstory, knowledge base, interests, and specialized skills. This field is the role's prompt — for example, an expert at telling jokes or stories.
- Timbre: The voice timbre for the role. Match the timbre to the target region and language. For example, an AI doll for the US market must use a region-supported timbre. Filter timbre resources by region and language.
- Language: The languages supported in chat, covering both text-to-speech (TTS) and automatic speech recognition (ASR). When you select English, both input and output default to English.
- Label: A category for the role, used for grouped management in panels and service displays.
- Avatar: An uploaded image shown across panels and service channels. Keep avatar styling consistent for visual coherence.
Apply roles to an agent
Each agent can bind one or more roles to deliver contextual dialogue across product scenarios.
Path: Create Role > Variables > Role Variables > Preset Role Management.
Follow these steps:
-
On the My Agent page, click Create Agent, or click Develop in the Operation column.
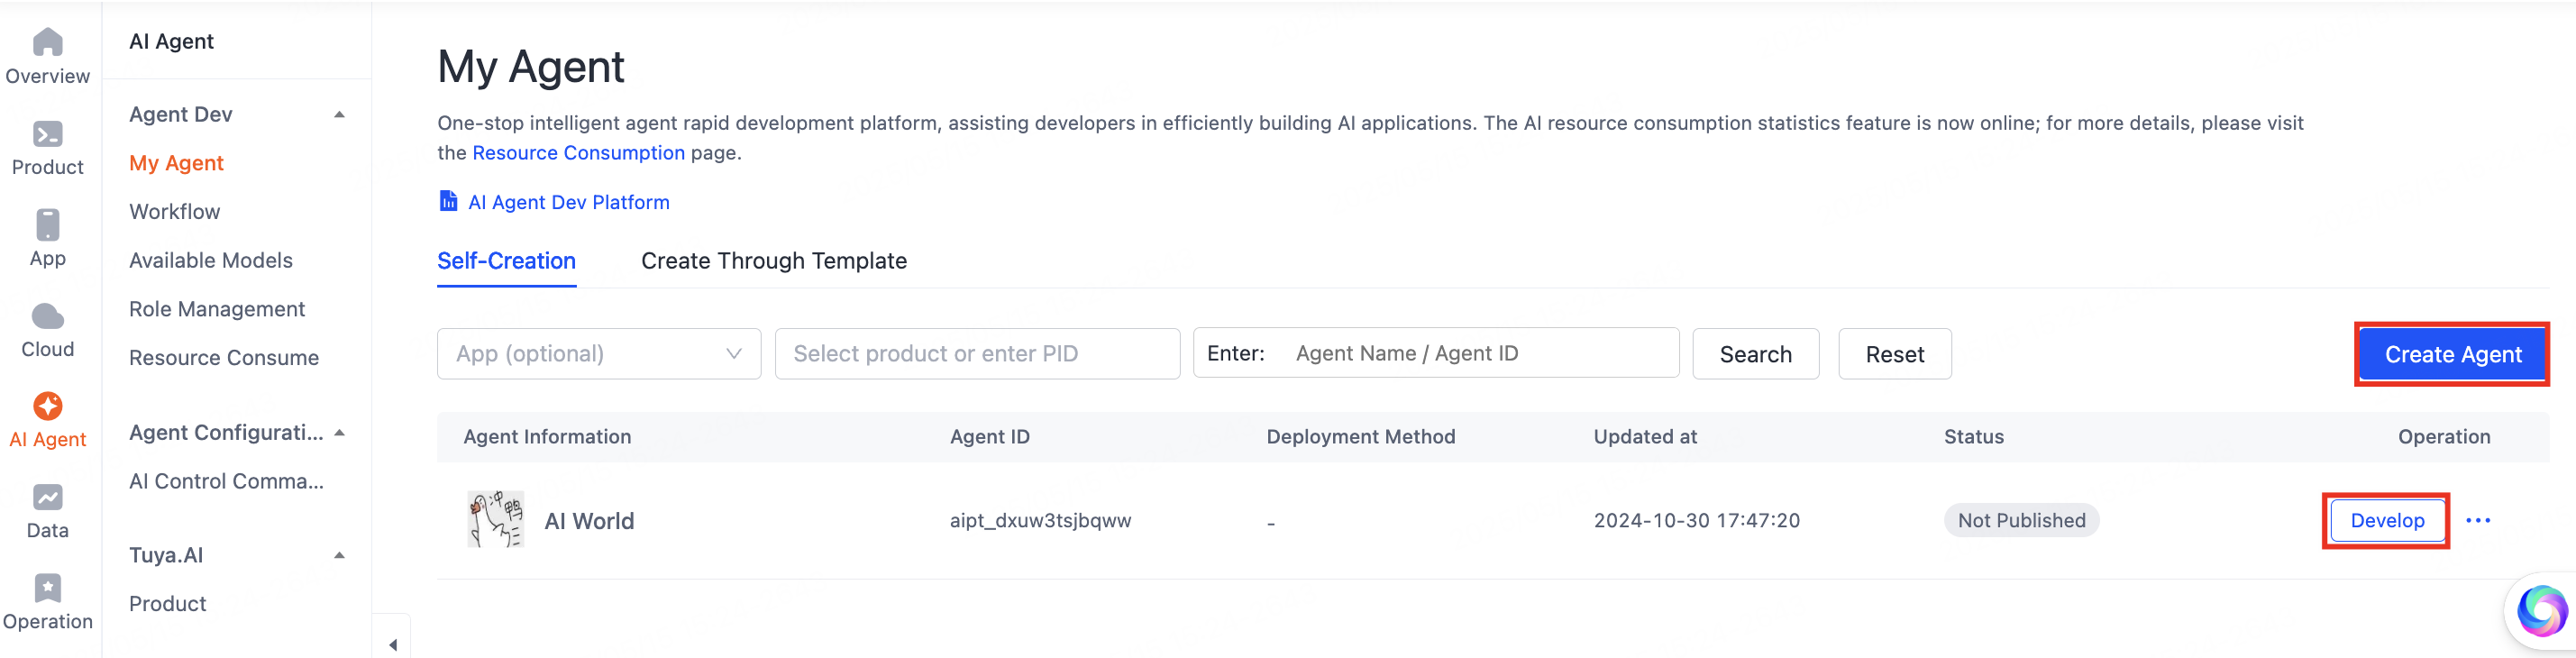
My Agent list with the Develop action -
On the 01 Model Configuration page, find Variables and click + to open the Edit Variables page.
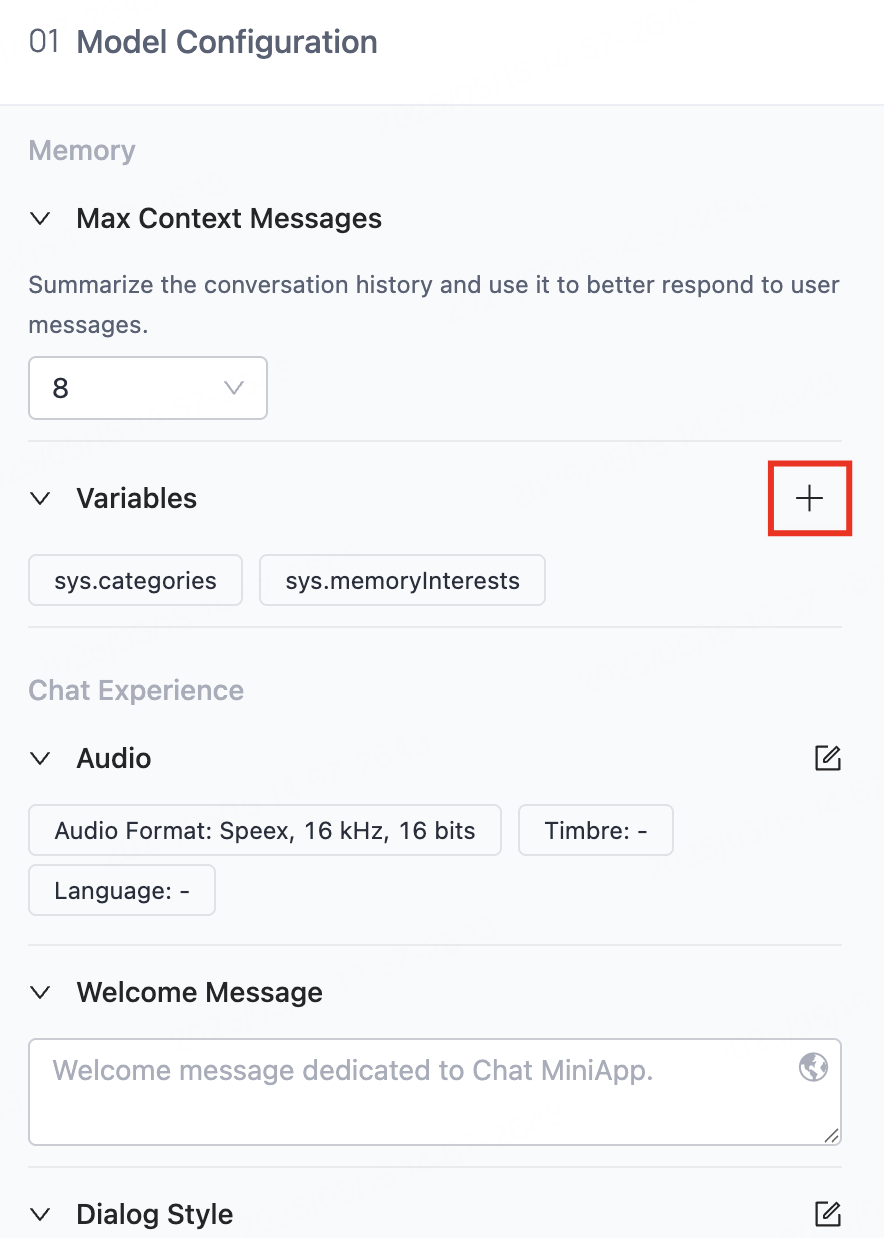
Edit Variables page -
Enable Preset Role Management. Role variables suit AI toys, smart speakers, and other scenarios that need predefined roles. Use this feature with a product control panel so users can customize roles, timbres, and personalities.
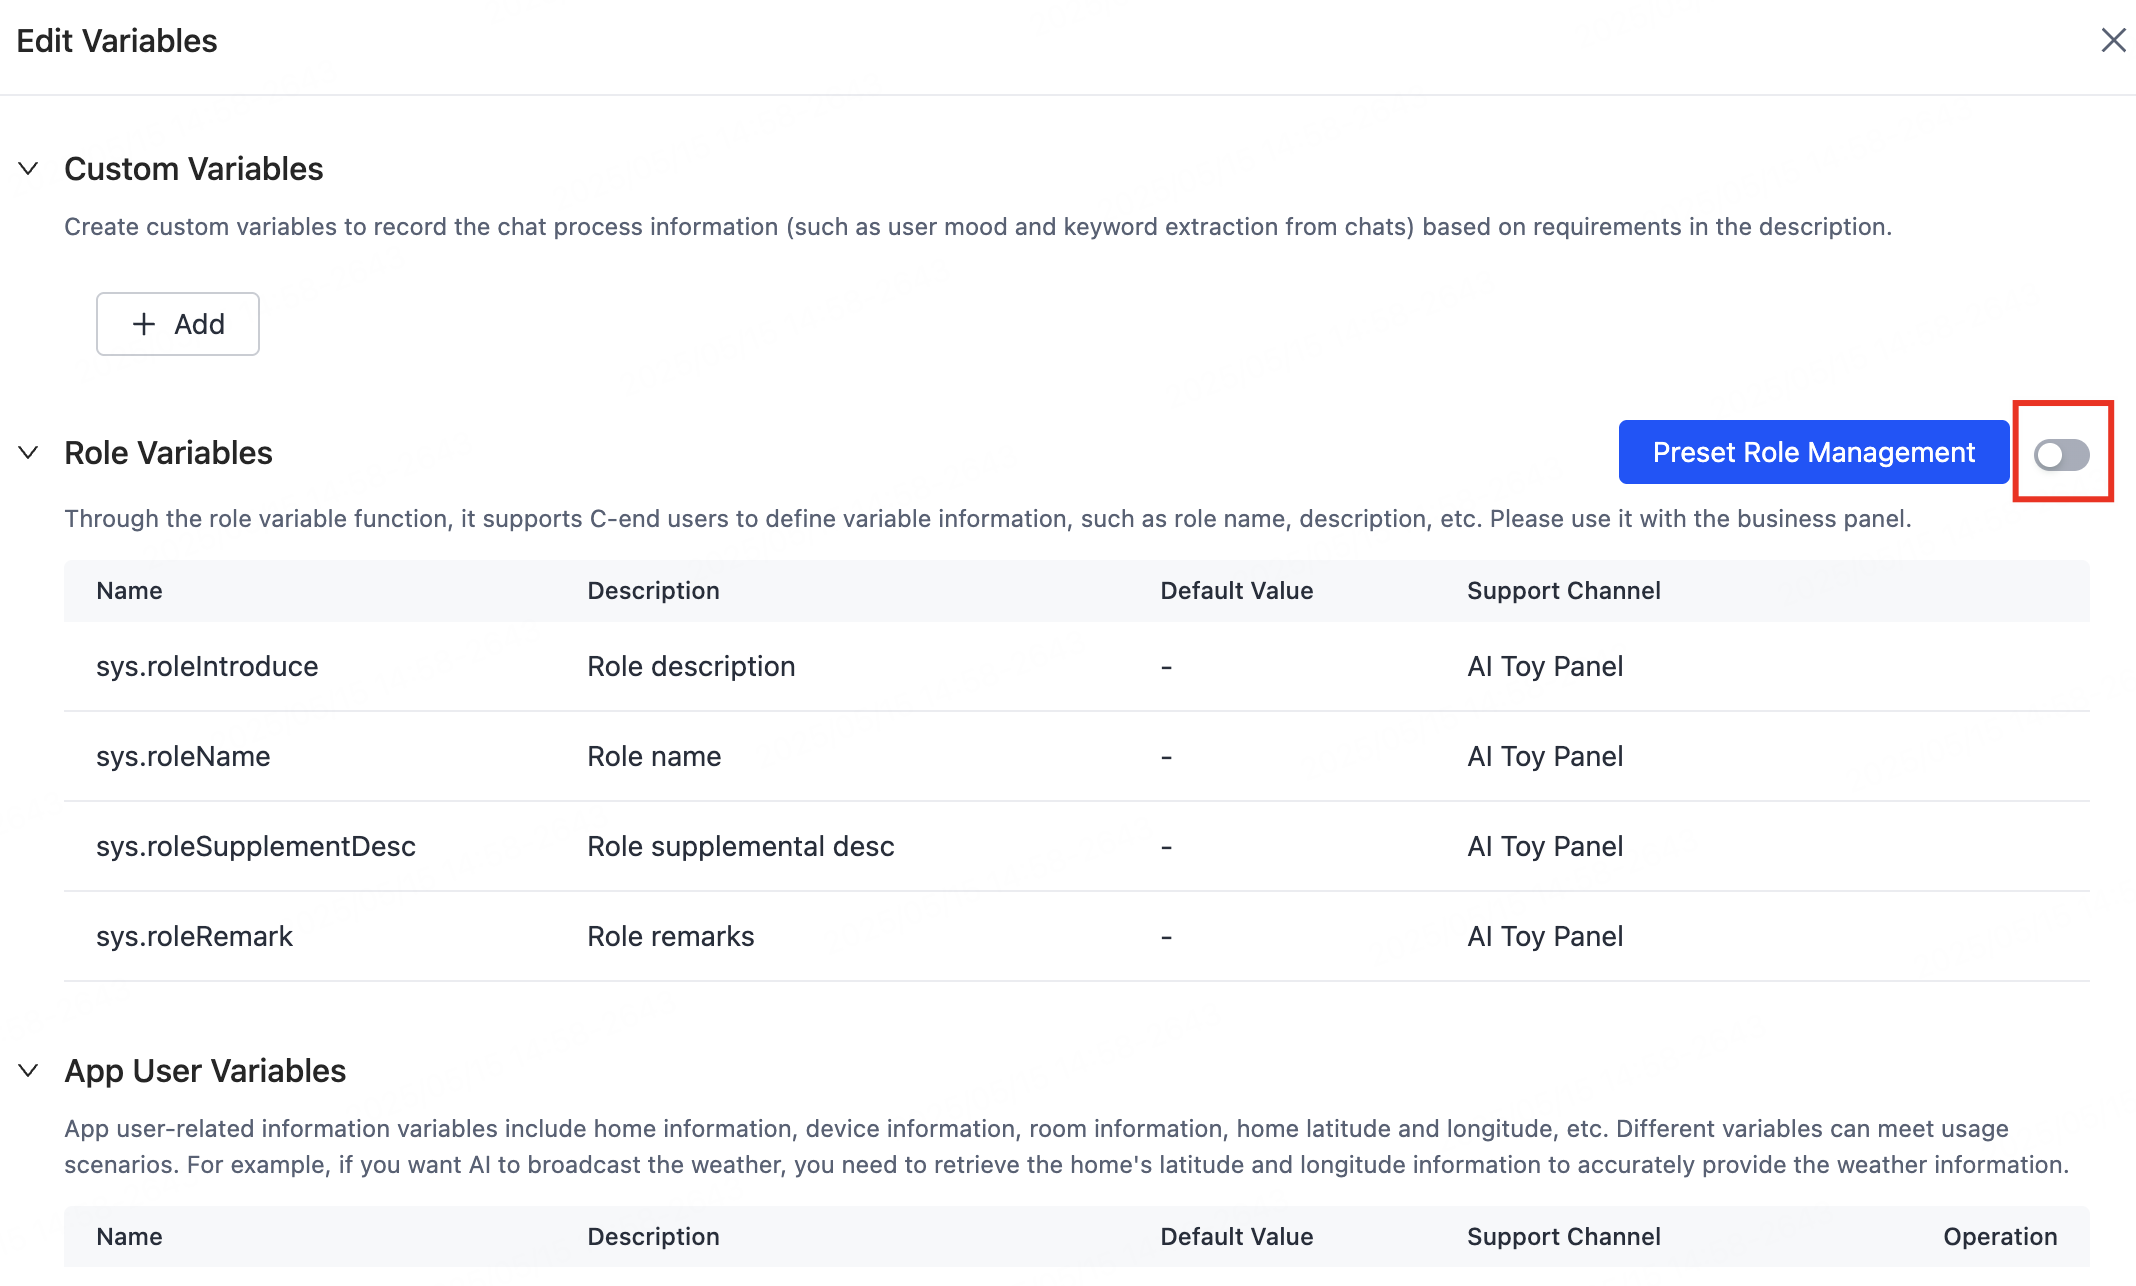
Preset Role Management toggle -
Click Preset Role Management, then click Add Preset Role to choose an official or custom role.
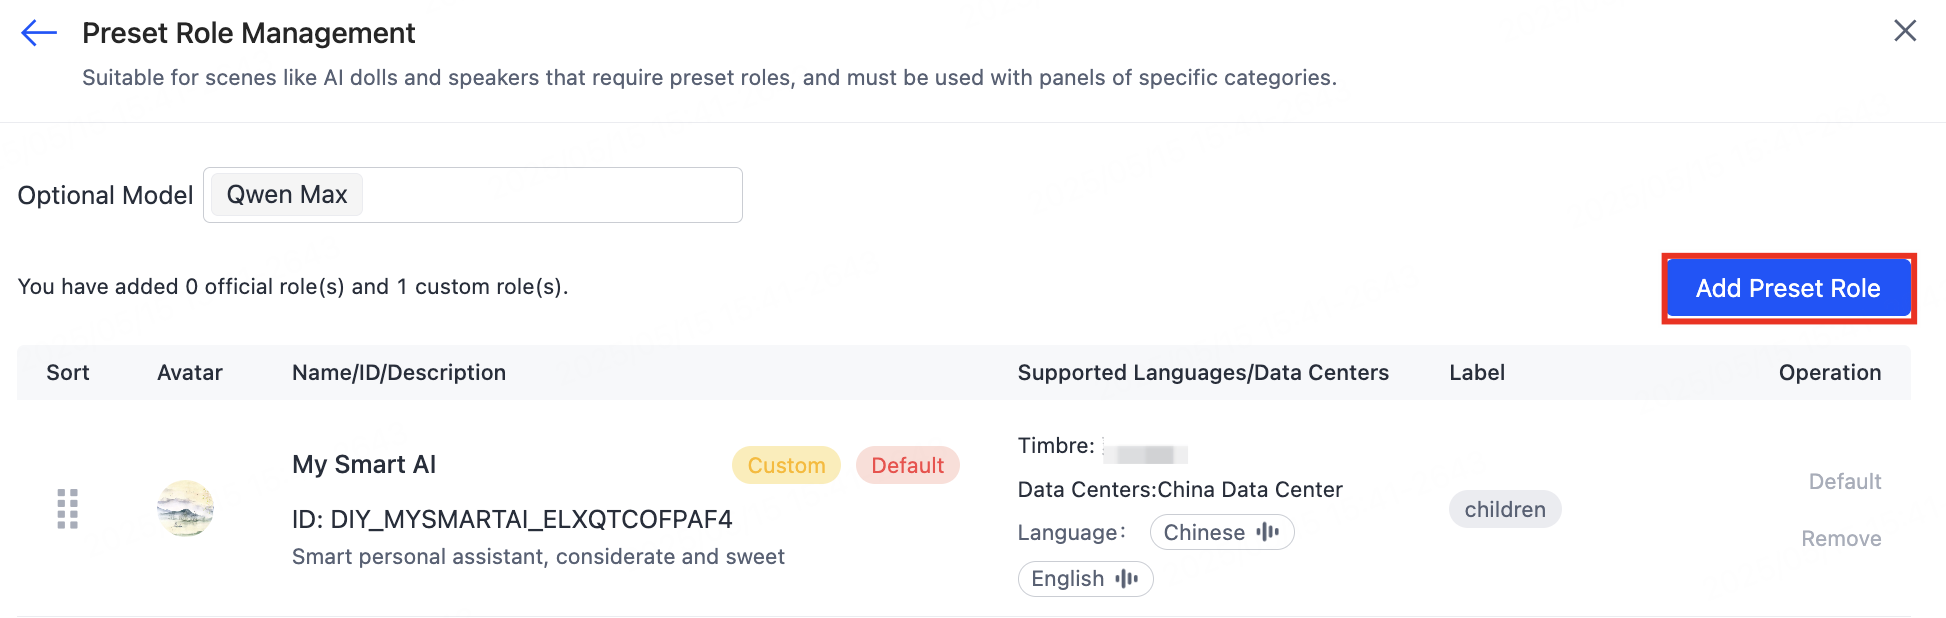
Add Preset Role dialog -
After you enable variables, finish agent development, and bind the agent to devices, the AI toy's control panel shows the preset role profiles. Users can switch between roles.
Work with the AI toy panel
The AI toy solution shows how to use roles with a panel. For more details, see AI Capabilities Development.
-
Link a product with your agent.
Product linked to an agent -
Configure role variables and preset roles.
Role variables configuration Preset roles configuration -
Select the official panel and develop the panel interactions.
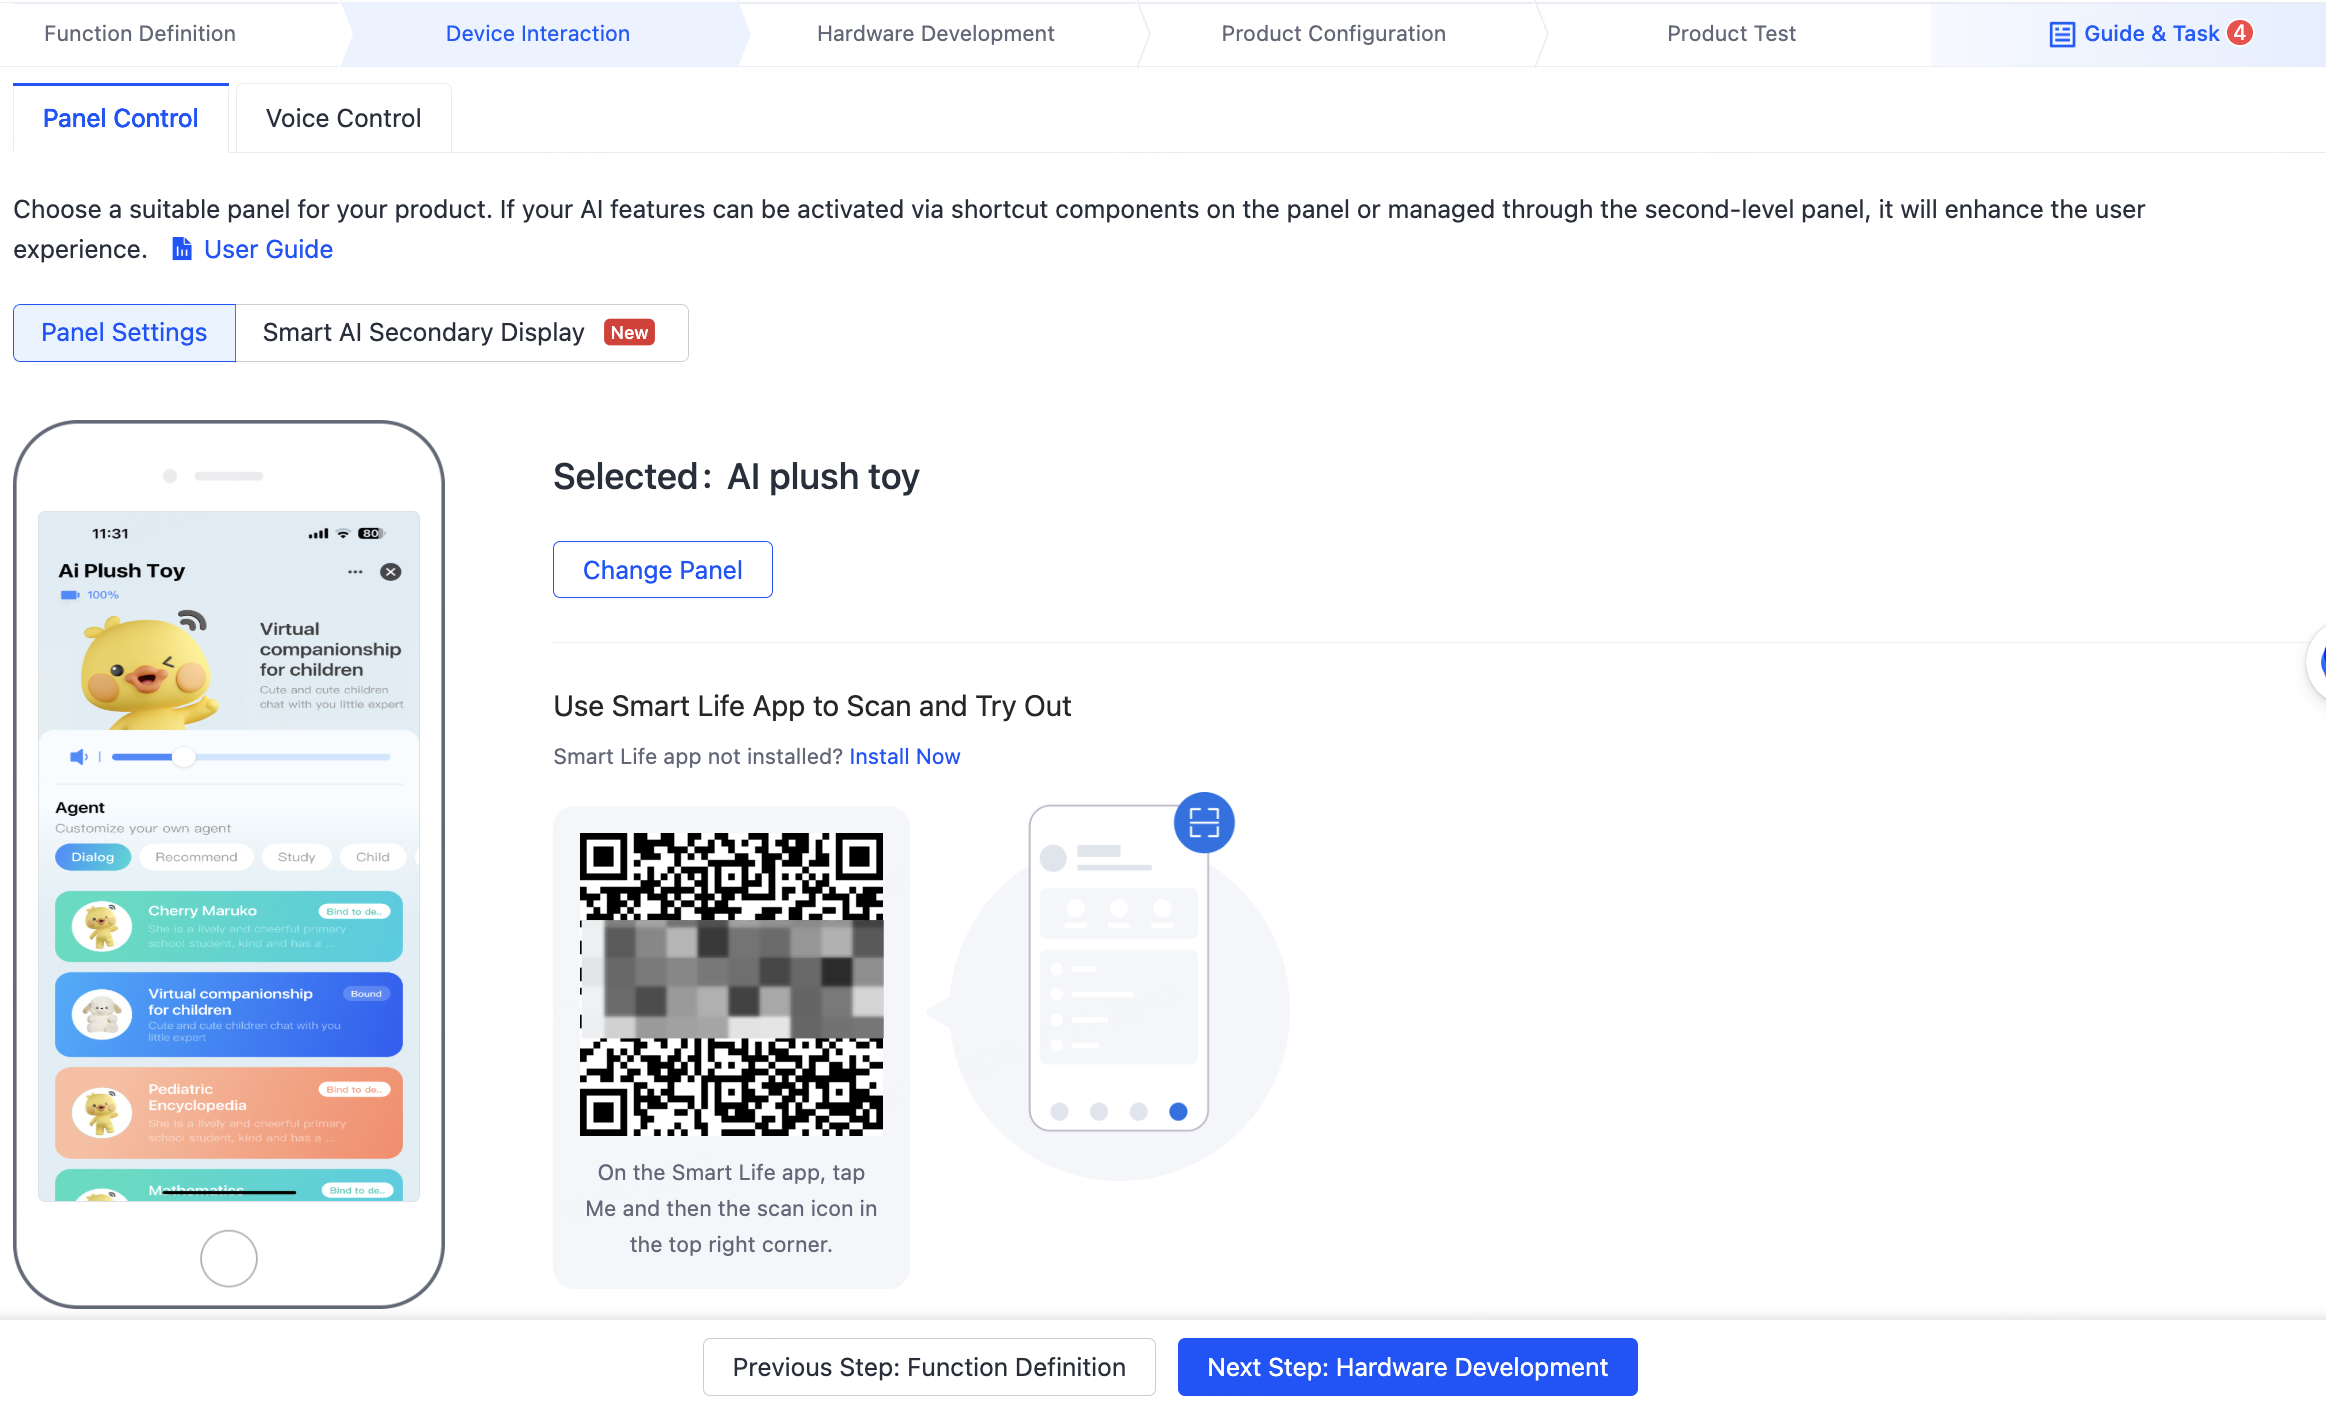
Official panel selection -
View the panel. Users can switch among the roles configured for the agent.
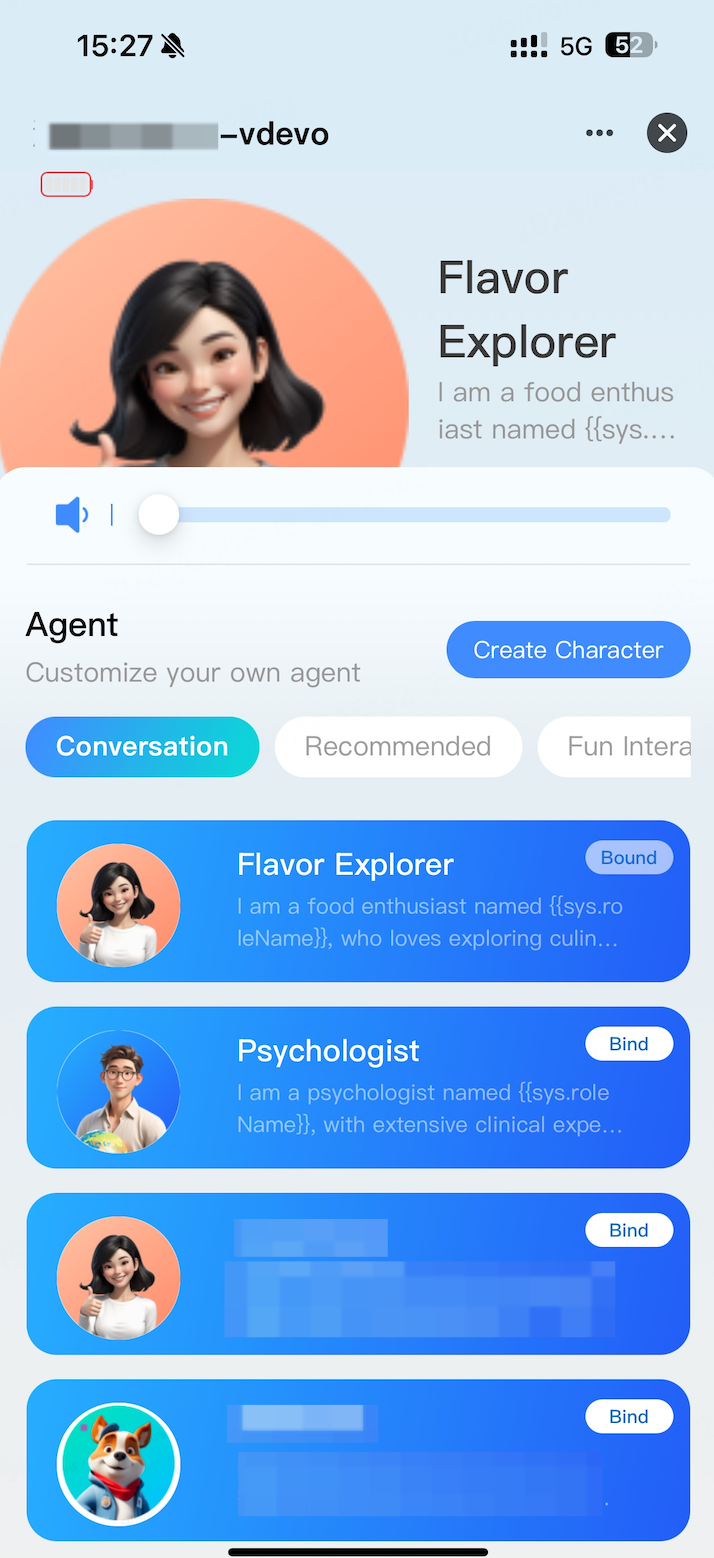
Panel showing role switching
See also
- Agent Evaluation — test how each role responds
- Self-control Commands — let the device act on voice commands