TuyaOpenClaw Quick Start (Raspberry Pi 5)
This guide walks you through building and running TuyaOpenClaw (formerly DuckyClaw) on a Raspberry Pi 5. The Pi is a Linux host target: you build an executable (no firmware flashing). It is for developers who want to run TuyaOpenClaw on Raspberry Pi 5 and connect the device to Tuya Cloud via the Smart Life app.
Prerequisites
- None beyond the Quick Start overview. Basic familiarity with a terminal and Git is helpful.
Requirements
- Raspberry Pi 5 and power adapter.
- Computer running Windows 10/11, Linux (e.g. Ubuntu 20/22/24 LTS), or macOS (for building; cross-compile is Linux-only).
- Tuya Cloud: This demo uses Tuya Cloud services. You need a valid license key (authorization code) and correct PID, UUID, and AuthKey in
tuya_app_config.hfor cloud and LLM features.
If your Raspberry Pi has microphone and speaker support (e.g. USB mic/speaker), ASR (Automatic Speech Recognition) is enabled as the default input method and can coexist with IM (messaging apps).
Steps
1. Install build tools (Python, Make, Git)
Install the required tools on your host machine.
We recommend Ubuntu 20, 22, or 24 LTS.
Install the required packages:
sudo apt-get install lcov cmake-curses-gui build-essential ninja-build wget git python3 python3-pip python3-venv libc6-i386 libsystemd-dev
2. Clone the repo
You can increase Git buffer size for large clones:
git config --global http.postBuffer 524288000

# Github repo
git clone https://github.com/tuya/DuckyClaw.git

# Gitee repo
git clone https://gitee.com/tuya-open/DuckyClaw.git
Use a project path without spaces or non-ASCII characters. On Windows, avoid using the C: drive root.
3. Activate the build environment
cd DuckyClaw

# update from github
git submodule update --init

# update from gitee
git config --global url."https://gitee.com/tuya-open/".insteadOf "https://github.com/tuya/"
git submodule update --init
If you need to switch back to pulling code from Github, run:
git config --global url."https://github.com/tuya/".insteadOf "https://gitee.com/tuya/"
Activate the TuyaOpen build environment so tos.py is available:
You must run the activation command again in each new terminal session.
. ./TuyaOpen/export.sh
Verify the environment:
tos.py version
tos.py check
You should see version output and a list of tools (git, cmake, make, ninja) with OK status. Submodules will be downloaded if needed.
4. Select the board configuration
Run the config chooser from the project root:
cd ..
tos.py config choice
Enter 4 to select RaspberryPi.config:
--------------------
1. ATK_T5AI_MINI_BOARD_2.4LCD_CAMERA.config
2. DshanPi_A1.config
3. ESP32S3_BREAD_COMPACT_WIFI.config
4. RaspberryPi.config
5. TUYA_T5AI_BOARD_LCD_3.5_CAMERA.config
6. WAVESHARE_T5AI_TOUCH_AMOLED_1_75.config
--------------------
Input "q" to exit.
Choice config file: 4
5. Edit application configuration
Open DuckyClaw/include/tuya_app_config.h and set the following.
LLM / Tuya Cloud (required for cloud and AI):
TUYA_PRODUCT_ID— your product ID (PID); this is the binding key between the device and cloud configurations.TUYA_OPENSDK_UUID— Open SDK UUID.TUYA_OPENSDK_AUTHKEY— Open SDK AuthKey.
Replace the placeholder values. Obtain:
- PID: Tuya product / PID.
- UUID and AuthKey: Tuya IoT Platform – Open SDK purchase.
IM configuration (optional): To receive TuyaOpenClaw notifications or interact via a messaging app, set the channel to weixin, feishu, telegram, or discord and fill in the corresponding credentials in tuya_app_config.h:
// IM configuration
// feishu | telegram | discord | weixin
#define IM_SECRET_CHANNEL_MODE      "feishu"

#define IM_SECRET_FS_APP_ID         ""
#define IM_SECRET_FS_APP_SECRET     ""

#define IM_SECRET_DC_TOKEN          ""
#define IM_SECRET_DC_CHANNEL_ID     ""

#define IM_SECRET_TG_TOKEN          ""
- For Feishu: set
IM_SECRET_CHANNEL_MODEto"feishu"and fillIM_SECRET_FS_APP_IDandIM_SECRET_FS_APP_SECRET. - For Discord: set
IM_SECRET_CHANNEL_MODEto"discord"and fillIM_SECRET_DC_TOKENandIM_SECRET_DC_CHANNEL_ID. - For Telegram: set
IM_SECRET_CHANNEL_MODEto"telegram"and fillIM_SECRET_TG_TOKEN. - For Weixin: set
IM_SECRET_CHANNEL_MODEto"weixin". On first login, open the link printed in the log and scan the QR code with WeChat to bind. Press the reset button three times to clear Wi-Fi provisioning data and the Weixin binding.
[weixin] =========================================================
[weixin]   Weixin QR Login
[weixin]   Open this URL in your PC browser, then scan with WeChat:
[weixin]   https://open.weixin.qq.com/connect/qrconnect?...
[weixin] =========================================================
Configure IM at runtime via CLI
You can also configure IM without editing the header: after the program is running, press Enter to enter the tuya> shell, then use the IM commands (run im_help for usage):
tuya> im_help
tuya> im_set_channel_mode <telegram|discord|feishu>
tuya> im_set_fs_appid <app_id>
tuya> im_set_fs_appsecret <app_secret>
tuya> im_set_dc_token <token>
tuya> im_set_dc_channel <channel_id>
tuya> im_set_tg_token <token>
6. Build and run
Raspberry Pi is a Linux host target: there is no flashing. The build produces an executable in dist/. You can build locally on the Pi or cross-compile on a Linux PC.
Build options: Local build — build and run directly on the Raspberry Pi (recommended). Cross-compile — build on a Linux PC, then copy the binary to the Pi. macOS does not support cross-compile; use a Linux host or build on the Pi.
Build (with RaspberryPi.config selected):
tos.py build
If you built on the Pi: go to the next step. If you cross-compiled on a PC: copy the built artifact to the Pi. The exact path under dist/ depends on your project version (e.g. dist/DuckyClaw_1.0.1/DuckyClaw_1.0.1.elf). Example:
scp -r dist/DuckyClaw_* username@<pi-ip>:~/
Replace username with your Pi user and <pi-ip> with the Pi’s IP address.
Run on the Raspberry Pi:
./DuckyClaw_1.0.1.elf
(Use the actual binary name from your dist/ folder.)
Expected outcome: The build succeeds, the executable runs on the Pi, and the device enters activation mode so you can add it in the Smart Life app.
7. Device activation and network setup
To use Tuya Cloud features, add the device in the Smart Life app.
Download the Smart Life app
Install Smart Life (智能生活) from the Apple App Store or your Android app store, or scan the QR code on the Tuya Smart Life app page.
Confirm device is in provisioning mode
Before adding the device, ensure it is in activation (provisioning) mode. In the terminal or log you should see lines similar to:
[01-01 00:00:01 ty D][tuya_iot.c:774] STATE_START
[01-01 00:00:01 ty I][tuya_iot.c:792] Activation data read fail, go activation mode...
[01-01 00:00:01 ty D][tuya_main.c:143] Tuya Event ID:1(TUYA_EVENT_BIND_START)
Add the device: QR code (Linux / Raspberry Pi)
Many TuyaOpen Linux targets (including Raspberry Pi) support scan-to-provision: the device shows a QR code in the terminal, and you scan it with the Smart Life app.
- Ensure the device is in provisioning mode and the QR code is visible in the terminal/log.
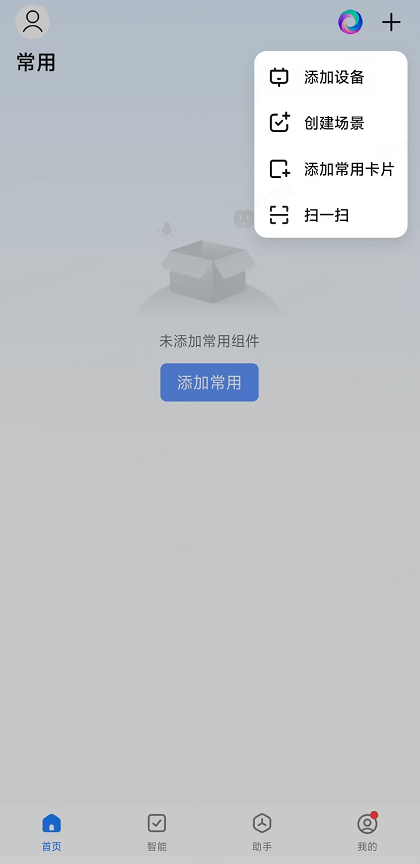
- Open the Smart Life app and tap the + (Add device) on the home screen.
- Choose Scan and scan the QR code shown by the device.
- Follow the in-app steps to complete binding and network setup.
Alternatively, add the device via the normal add-device flow (grant Wi‑Fi and Bluetooth permissions, then discover and add the device). TuyaOpen-supported modules connect only to 2.4 GHz Wi‑Fi.
Troubleshooting
Device not discovered or provisioning fails due to invalid authorization
If authorization data was not written correctly, the device may log errors such as:
[01-01 00:00:00 ty E][tal_kv.c:269] lfs open UUID_TUYAOPEN -2 err
[01-01 00:00:00 ty E][tuya_authorize.c:107] Authorization read failure.
[01-01 00:00:00 ty W][tuya_main.c:288] Replace the TUYA_OPENSDK_UUID and TUYA_OPENSDK_AUTHKEY contents...
If the log shows uuid and authkey as placeholder values, the license (UUID and AuthKey) was not applied correctly. Obtain or purchase a TuyaOpen license at Tuya IoT Platform – Open SDK and set TUYA_OPENSDK_UUID and TUYA_OPENSDK_AUTHKEY in tuya_app_config.h, then rebuild and rerun.
If productkey (PID) appears as placeholders, the product ID was not set. Copy or create a product and get your PID from the Tuya product link, then set TUYA_PRODUCT_ID in tuya_app_config.h, rebuild, and rerun.