Step 4: Device Pairing w/ Smartphone
Device pairing connects and registers your device to the Tuya IoT Cloud, so you can control it remotely from a mobile app. This page pairs a flashed, authorized device using the SmartLife app.
Prerequisites
Before pairing, make sure you have:
- The SmartLife app installed on your phone. To install it, see Download the app.
- A device that has been flashed with firmware and authorized.
- The device in pairing mode.
For the switch_demo and your_chat_bot demos, restart the device 3 times within 5 seconds to enter pairing mode.
Pair the device
Download the app
Search for SmartLife in Apple's App Store and other major app stores, or scan the following QR code to download the app.
After successful registration and login, you can proceed with device pairing.
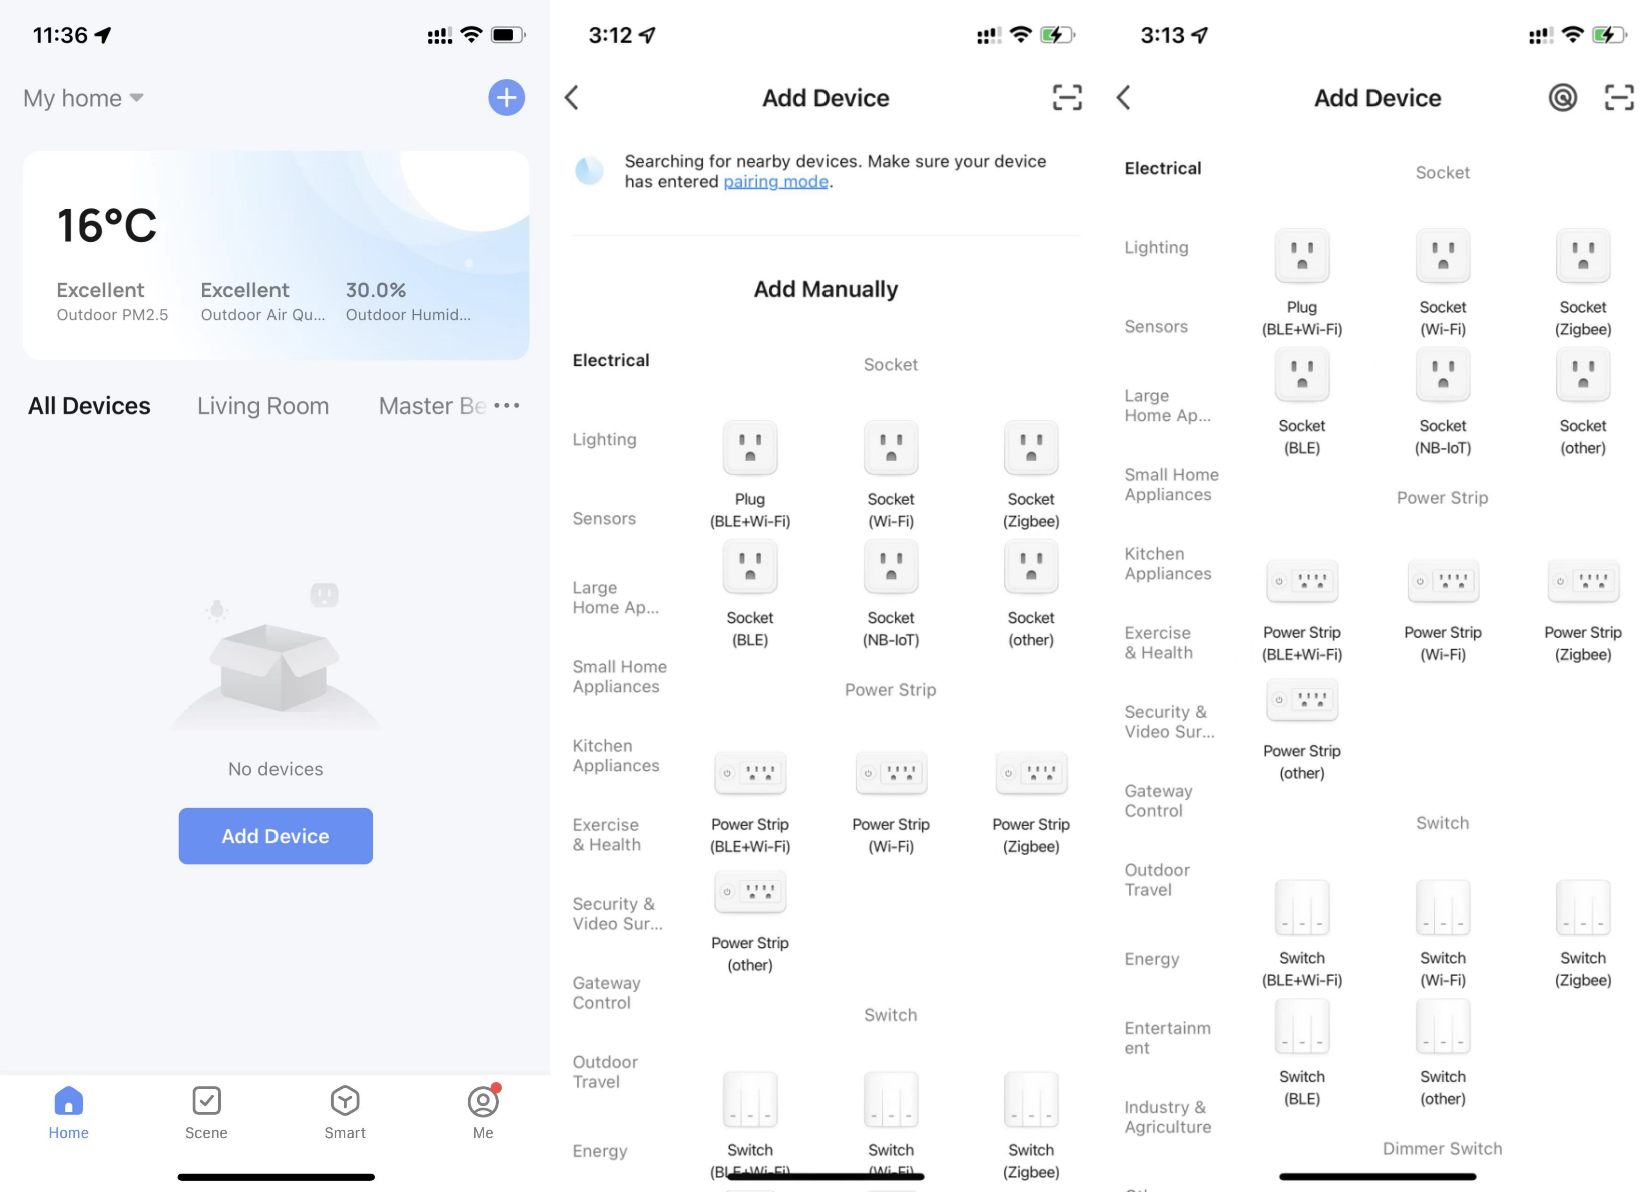
Add device
Before adding a device through the app, confirm the device is in pairing mode. Check the device logs for the following output (applies to TuyaOpen):
...
[01-01 00:00:01 ty D][tuya_iot.c:774] STATE_START
[01-01 00:00:01 ty I][tuya_iot.c:792] Activation data read fail, go activation mode...
[01-01 00:00:01 ty D][tuya_main.c:143] Tuya Event ID:1(TUYA_EVENT_BIND_START)
...
-
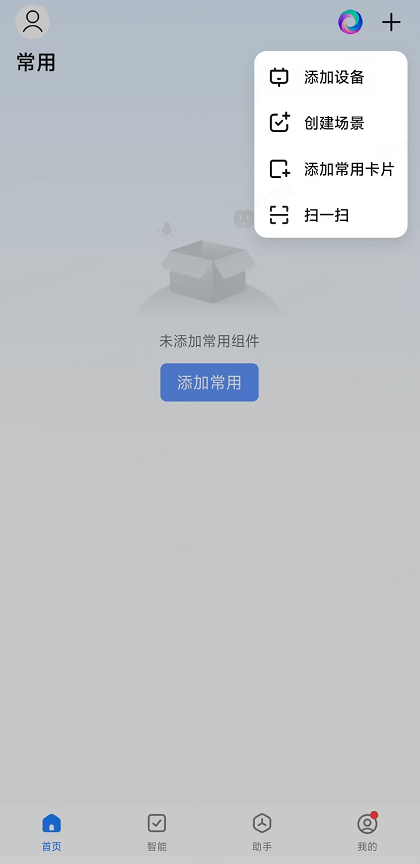
On the All Devices page, tap Add Device or the plus icon (+) in the top right corner to go to the Add Device page.
-
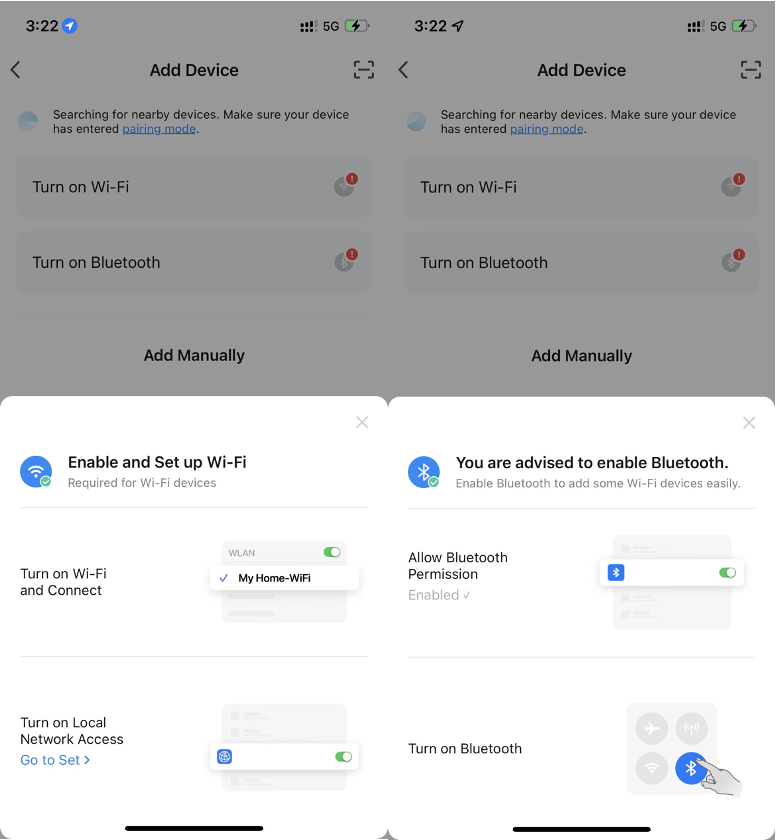
To add devices, the app must be granted Wi-Fi and Bluetooth permissions. If Wi-Fi or Bluetooth permissions are not turned on, nearby devices cannot be discovered.
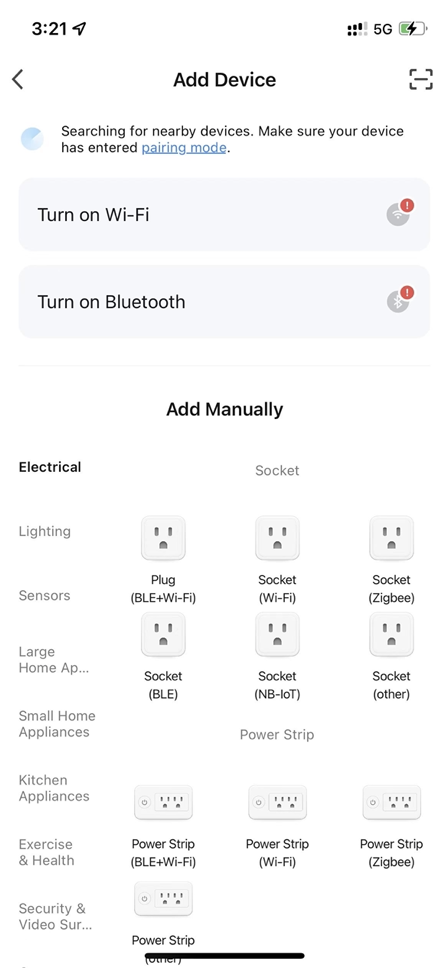
Tap Turn on Wi-Fi or Turn on Bluetooth to enable Wi-Fi or Bluetooth as instructed.
-
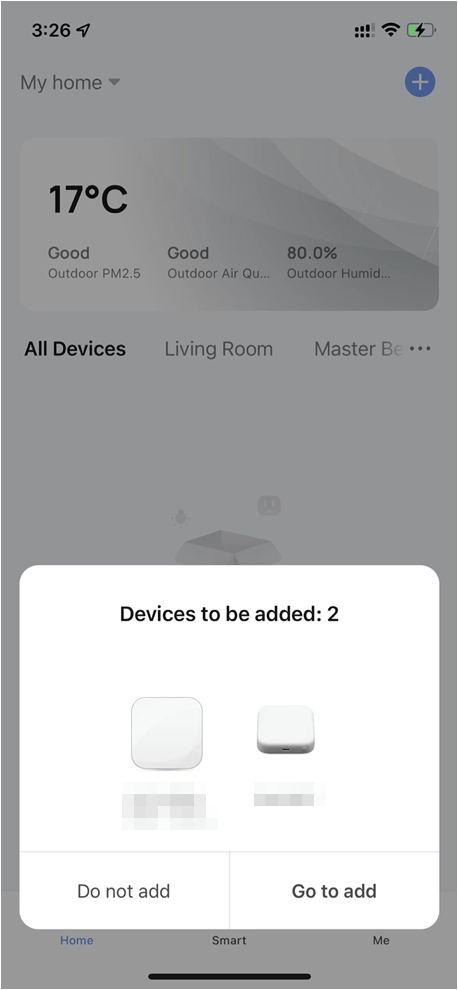
After properly configuring Wi-Fi and Bluetooth permissions, you can see nearby devices in pairing mode on the Home or Add Device page. Tap Go to add, and then follow the prompts on the app to complete device pairing.
Currently, TuyaOpen-supported modules can only connect to the 2.4 GHz band of routers. Attempting to pair with a 5 GHz band router will result in failure.
Scan to pair
Some TuyaOpen devices support pairing by scanning a QR code in the SmartLife app. This method is commonly used on Linux devices (such as Raspberry Pi), where the device prints the QR code directly to the terminal.
- Make sure the device is in pairing mode and a QR code is shown in the terminal/logs.
- Open the SmartLife app and tap + in the top right corner.
- Select Scan and point the camera at the QR code displayed by the device.
- Follow the on-screen instructions to complete pairing.
FAQs
Pairing failed due to incorrect authorization information
When pairing fails because the device's authorization information was not written correctly, the device outputs the following logs:
[01-01 00:00:00 ty E][tal_kv.c:269] lfs open UUID_TUYAOPEN -2 err
[01-01 00:00:00 ty E][tuya_authorize.c:107] Authorization read failure.
[01-01 00:00:00 ty W][tuya_main.c:288] Replace the TUYA_OPENSDK_UUID and TUYA_OPENSDK_AUTHKEY contents, otherwise the demo cannot work.
                 Visit https://platform.tuya.com/purchase/index?type=6 to get the open-sdk uuid and authkey.
[01-01 00:00:00 ty I][tuya_iot.c:538] tuya_iot_init
[01-01 00:00:00 ty D][tuya_iot.c:555] software_ver:1.0.1
[01-01 00:00:00 ty D][tuya_iot.c:556] productkey:xxxxxxxxxxxxxxxx
[01-01 00:00:00 ty D][tuya_iot.c:557] uuid:uuidxxxxxxxxxxxxxxxx
[01-01 00:00:00 ty D][tuya_iot.c:558] authkey:keyxxxxxxxxxxxxxxxxxxxxxxxxxxxxx
If both UUID and AuthKey display as xxxxxxxxxxxxxxxx, it indicates the authorization information was not properly written.
For more information, see the section Write device authorization information in GUI - tyutool Graphical Tool.