Hello World — IDE basics
Run an official example with zero code and learn the core TuyaOpen IDE chain: pick board → build → flash → read logs.
This is the smallest closed loop — you write no code, you just run an official example through the IDE. Finishing it teaches the core operation chain: pick board → build → flash → read logs.
Prerequisites
- The IDE extension is installed — see Install TuyaOpen IDE.
- A T5 AI Board (
T5AI_Board), connected to your computer with a USB cable.
Step 1: Enter from the board catalogue
-
Open VS Code or Cursor and confirm the TuyaOpen IDE extension is enabled.
-
Click the Boards icon in the left activity bar to browse the supported boards, chips, and SoC platforms with their full specs.
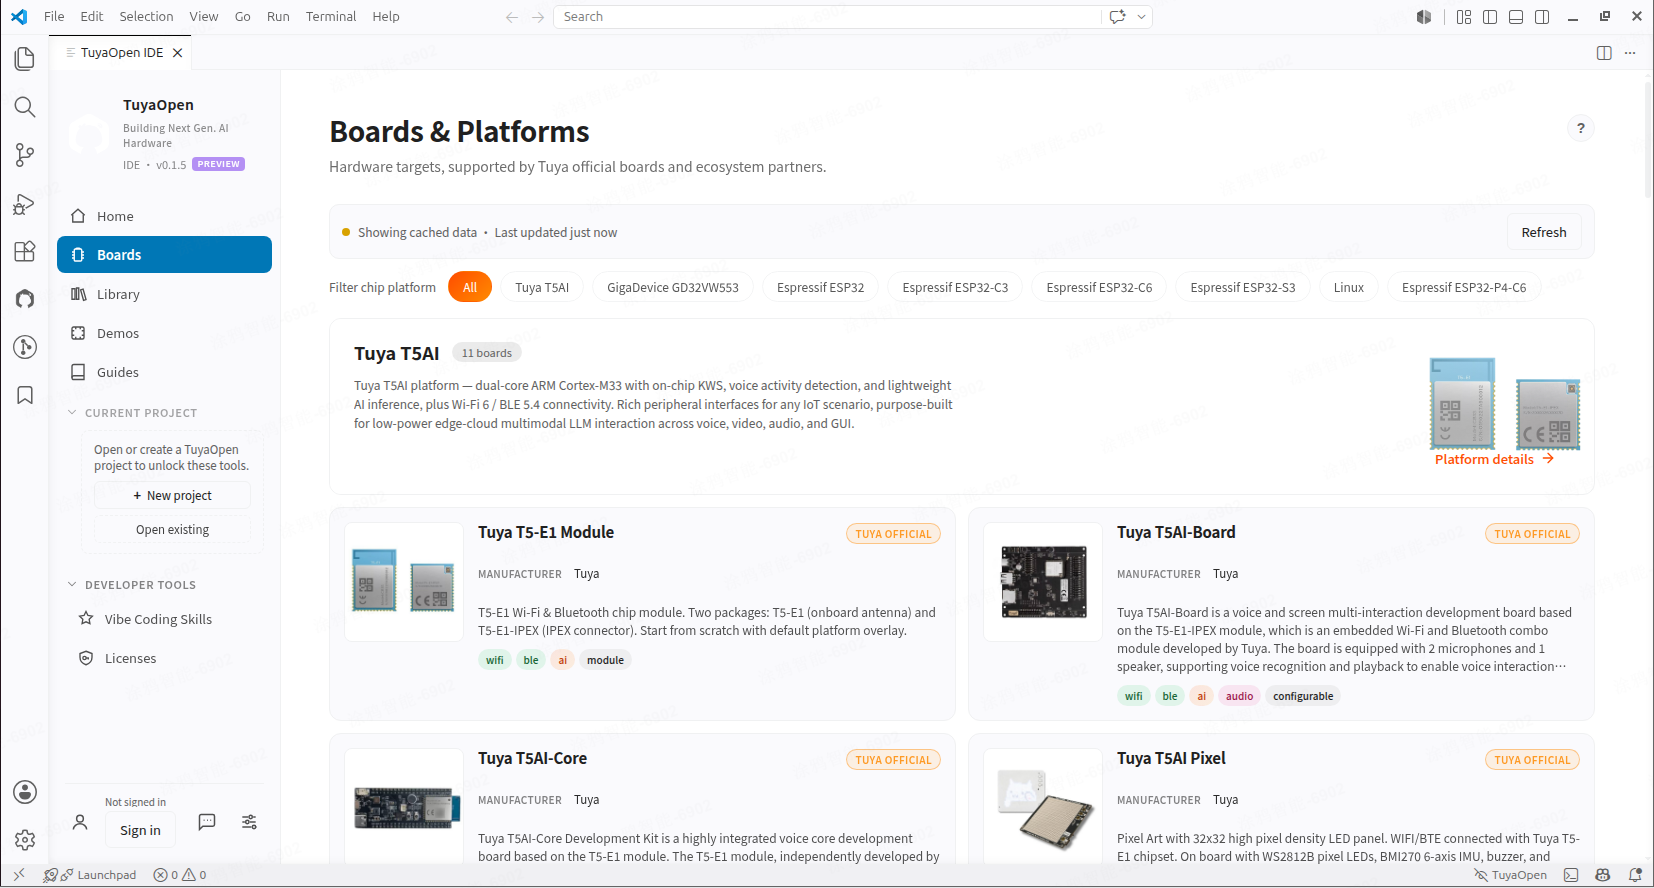
Boards icon in the IDE activity bar -
Find T5AI_Board in the list and open its detail page. You see a large amount of developer material — purchase links, schematics, datasheets, source code, 3D models, and more.
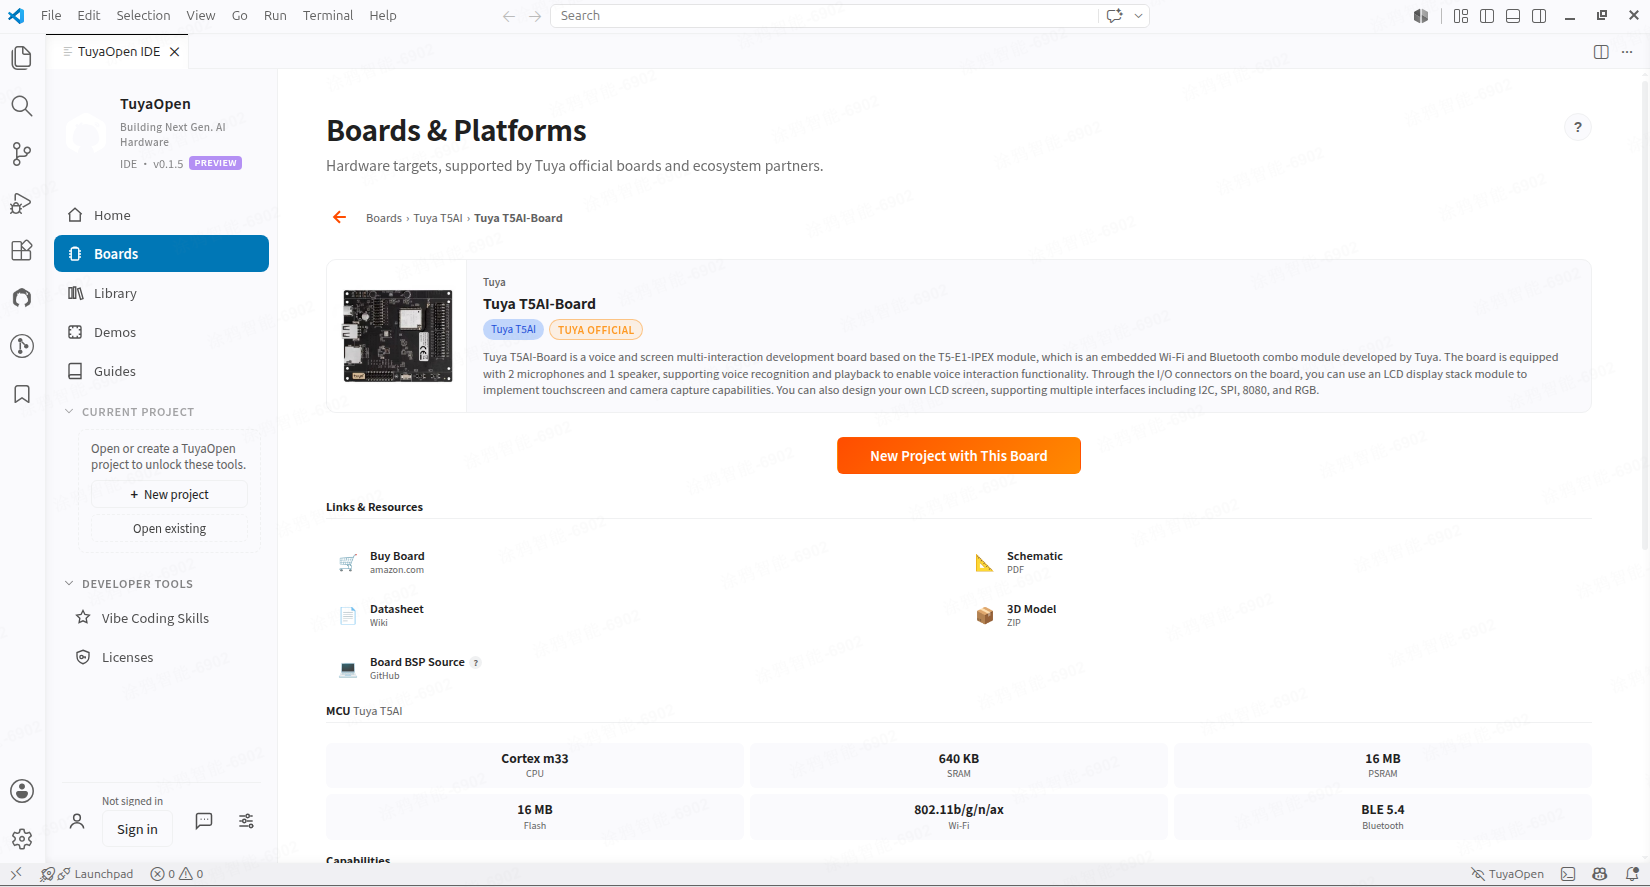
T5AI_Board detail page in the board catalogue 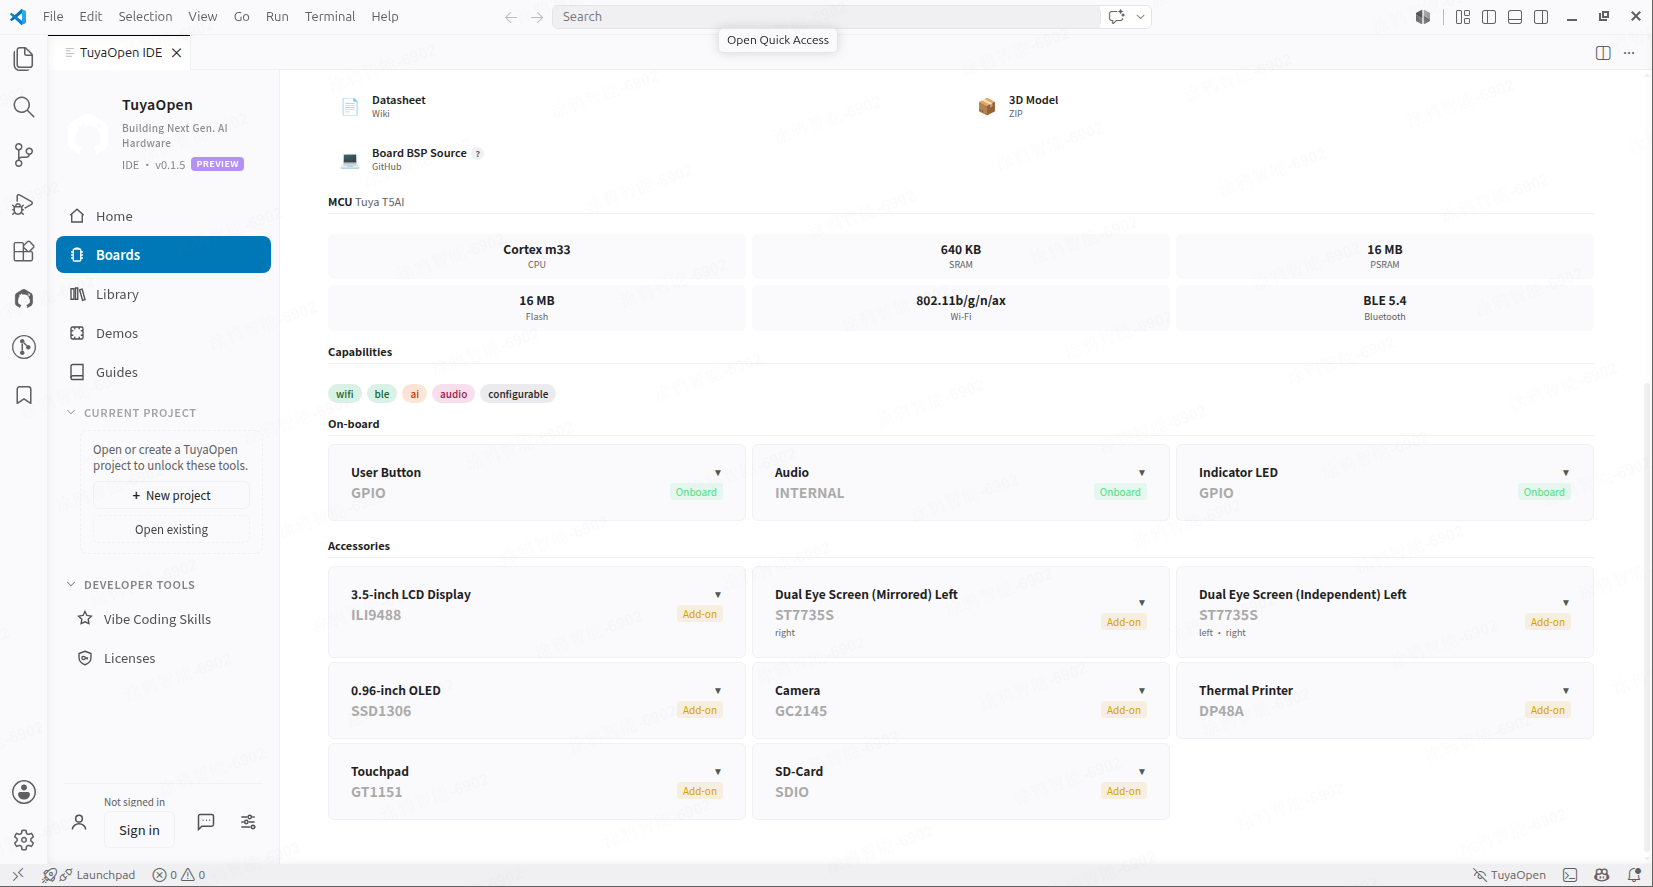
Board resources — schematic, datasheet, source, 3D model
Step 2: Create an example project
-
On the T5AI_Board detail page, click New Project with This Board.
-
Fill in a project name and a location, then click Create project.
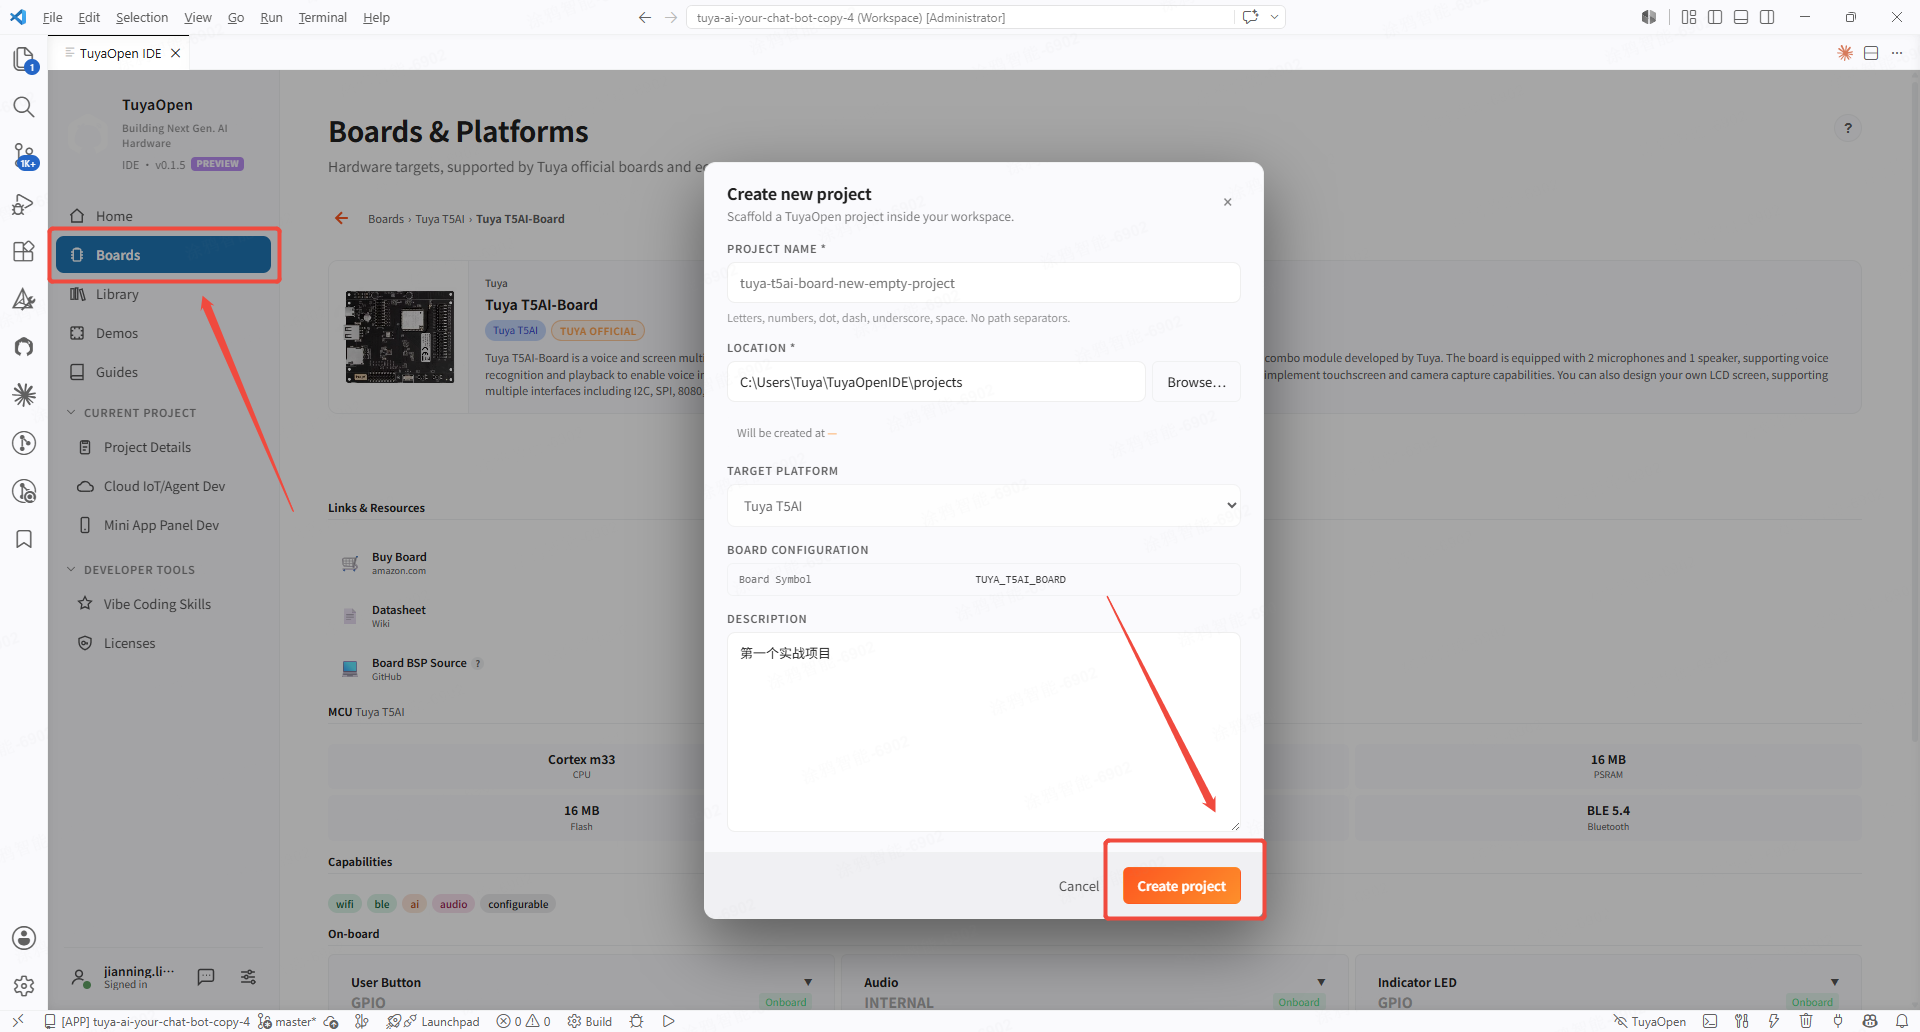
New project dialog from a board -
The IDE derives a project into your workspace and auto-configures the T5AI_Board board-level information.
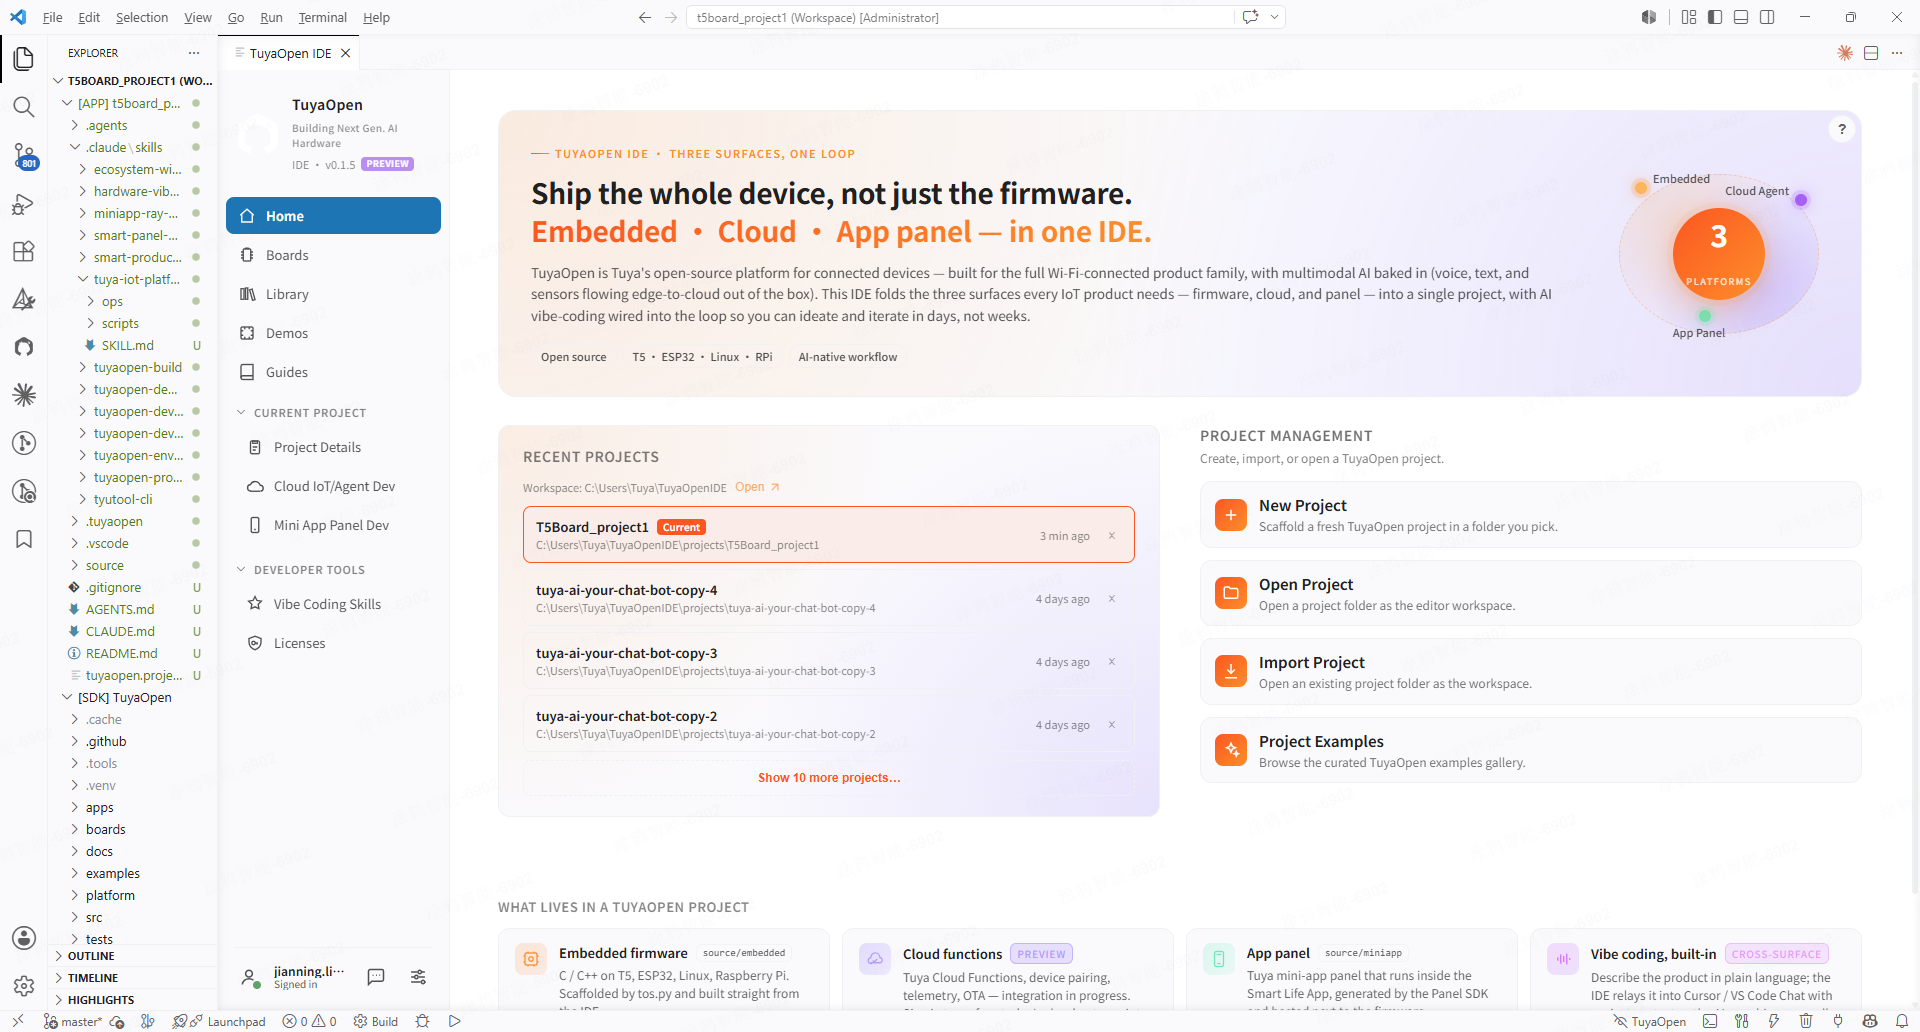
Scaffolded project workspace
Step 3: Build
Open Project Details in the IDE sidebar, then click Compile in Firmware Operations and wait for the build to finish. The Project Details view shows the firmware status visually.
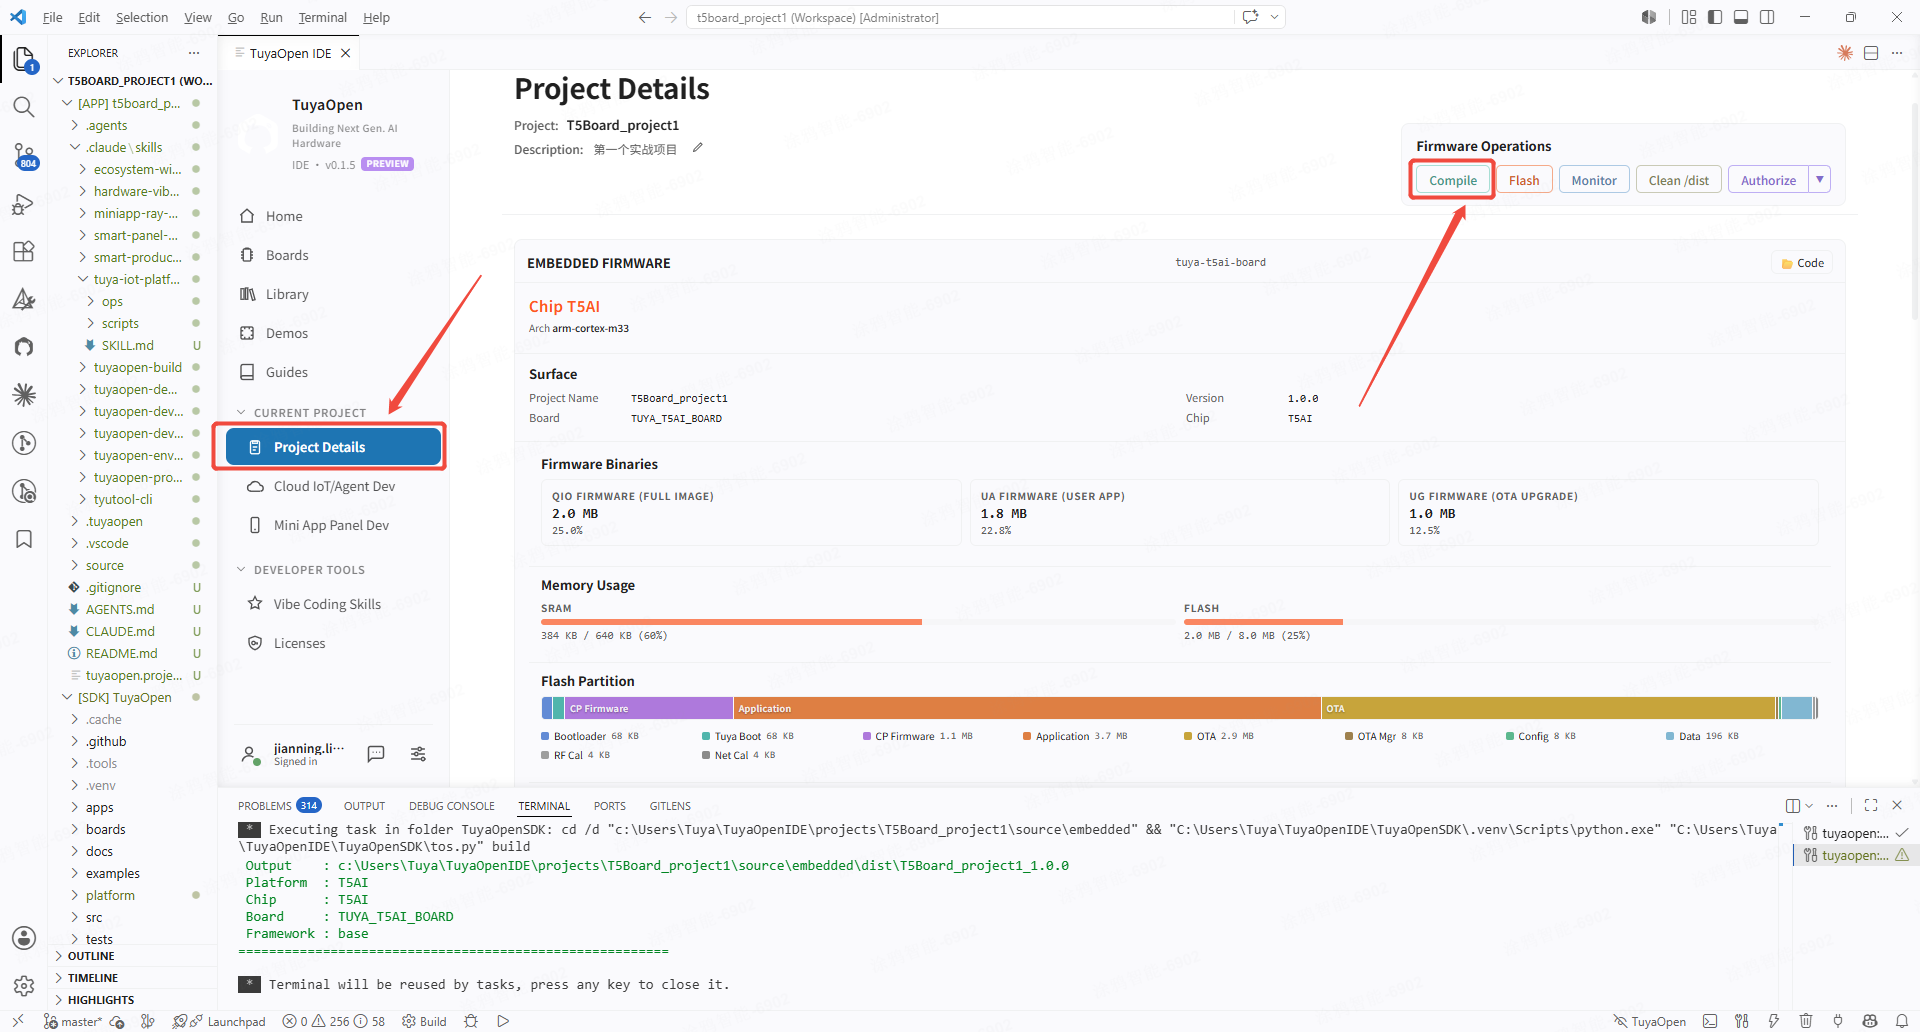
Expected output (build success):
[NOTE]:
====================[ BUILD SUCCESS ]===================
 Target    : T5Board_project1_QIO_1.0.0.bin
 Output    : .../dist/T5Board_project1_1.0.0
 Platform  : T5AI
 Chip      : T5AI
 Board     : TUYA_T5AI_BOARD
 Framework : base
========================================================
Step 4: Flash
-
Connect the board with USB. The T5AI_Board has two serial ports — one for flashing and one for logs. Make sure your USB cable carries data, not just power.
-
Click Flash. If you are unsure which port is the flash port, try either one. Here
COM4is selected.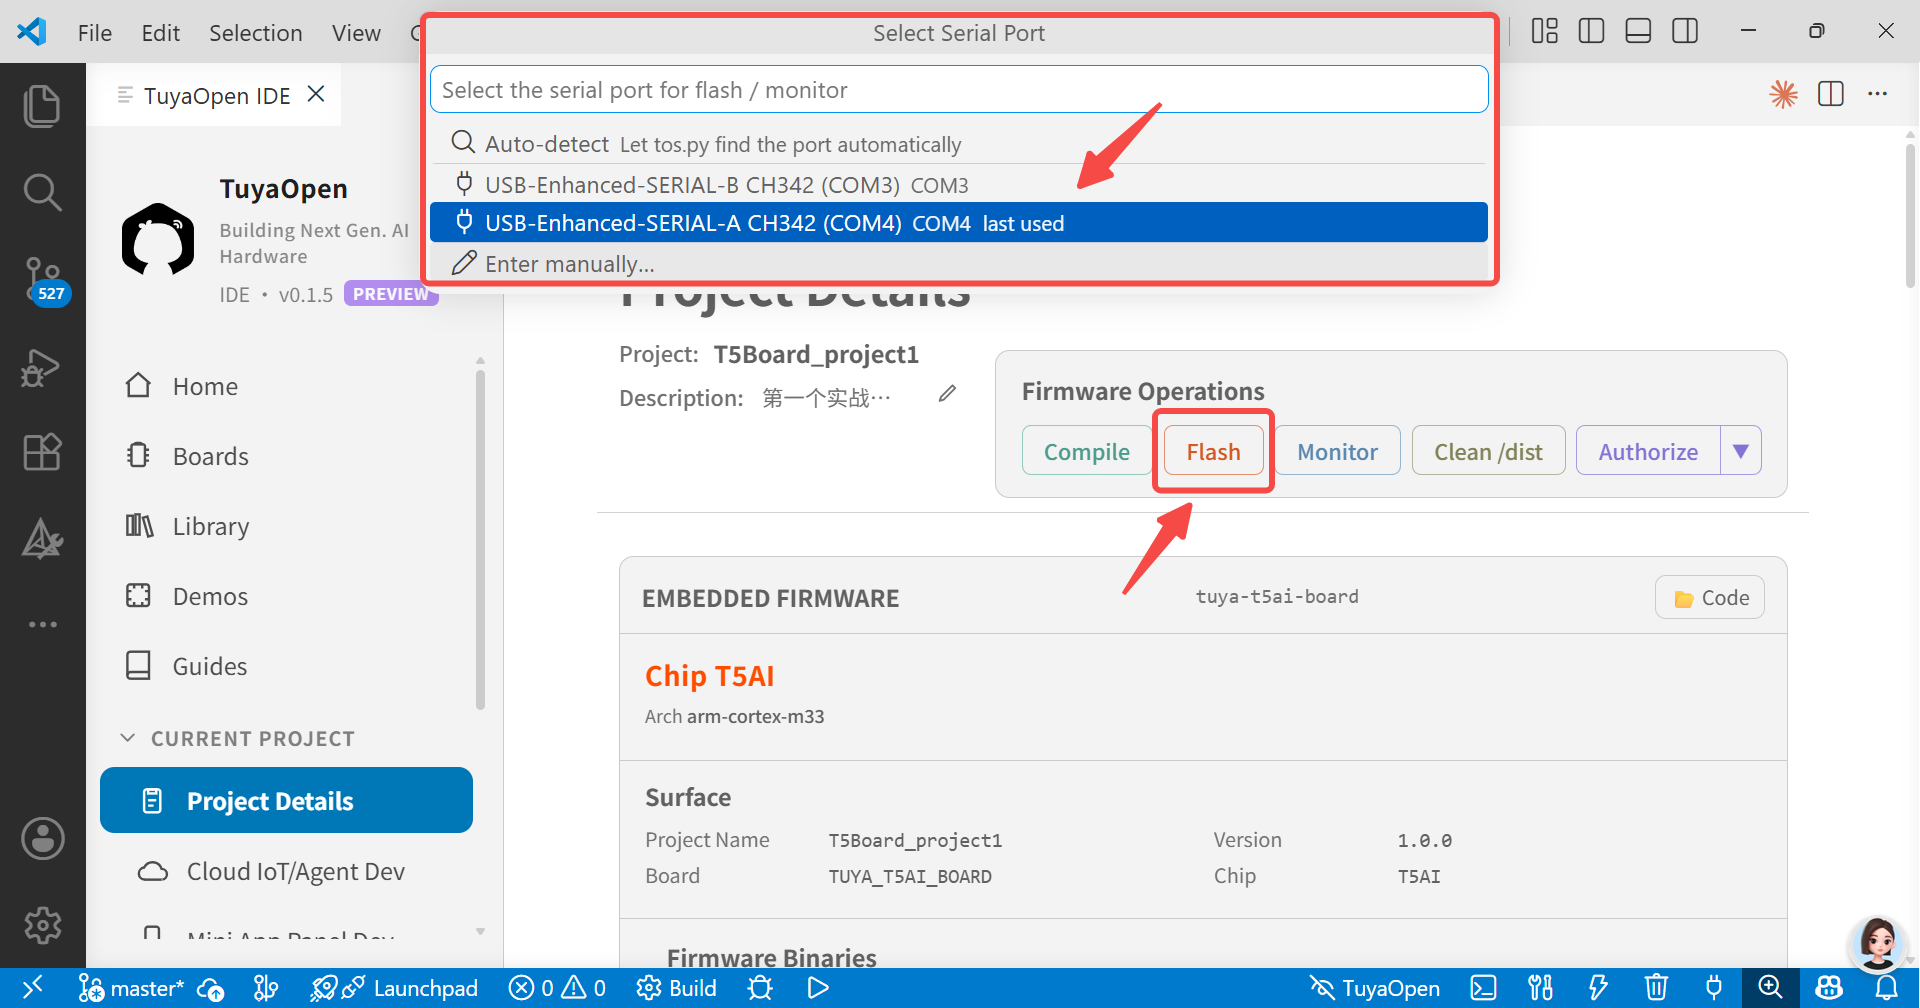
Flash button and port selection
Expected output (flash success):
write  T5AI  COM4  921600
  File   .../bin/T5Board_project1_QIO_1.0.0.bin  2.0 MiB
  Range  0x00000000 -> 0x001FF1E0

Handshake         OK
Flash ID          OK
Unprotect         OK
Write [1/1]       OK
...
Flash OK  38.9s
Step 5: Monitor the serial log
Click Monitor and select the log port — here COM3. When you see hello world, your first TuyaOpen project is running.
Expected output:
[01-01 00:00:00 ty D][tuya_app_main.c:8] hello world
If you do not see hello world, the monitor most likely opened too late — the line prints the moment flashing completes. Do not close the monitor terminal; flash again and the message appears.
Next step
You have the IDE basics. Continue with Practice 2: your_chat_bot — build a cloud-connected AI chat device end-to-end.